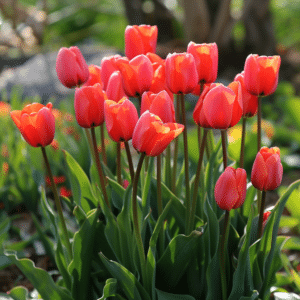
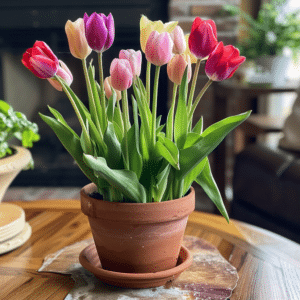
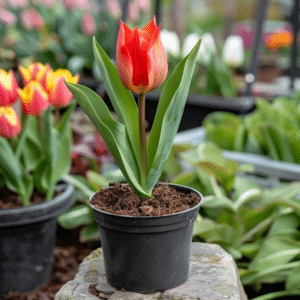
If you’re looking to add some vibrant pops of color to your garden, planting tulip bulbs is a fantastic choice. Tulips are known for their stunning, cup-shaped flowers in a wide range of colors, and they are relatively easy to grow. However, to ensure that your tulips thrive and bloom beautifully, there are a few key tips and techniques you should keep in mind.
Understanding Tulip Bulbs

Before you start planting tulip bulbs, it’s important to understand their anatomy. Tulip bulbs consist of several layers. The outermost layer is known as the tunic, which protects the bulb from damage. The basal plate at the bottom of the bulb is where the roots grow from, while the stem and leaves emerge from the top.
Now, let’s take a closer look at the anatomy of a tulip bulb. At the basal end of the tulip bulb, you’ll find the roots, which are responsible for absorbing water and nutrients from the soil. These roots play a crucial role in the overall health and growth of the tulip plant. As the bulb grows, new roots form near the basal plate, ensuring a steady supply of nutrients.
But what about the stem and leaves? Well, they emerge from the top of the bulb, surrounded by protective scales. These scales serve as a shield, safeguarding the delicate stem and leaves from any potential harm. Not only that, but these scales also have another important function – they store food and nutrients for the growing plant. This stored energy helps the tulip bulb to survive during periods of dormancy and fuels the growth of the plant when the conditions are favorable.
Different Varieties of Tulip Bulbs

Now that we have a better understanding of the anatomy of tulip bulbs, let’s explore the fascinating world of tulip varieties. There are countless tulip varieties available, each with its own unique characteristics and beauty.
One popular variety is the single early tulip. These tulips are the earliest to bloom in spring, bringing a burst of color and joy after the long winter months. With their vibrant hues and elegant shapes, single early tulips are a favorite among gardeners.
Another stunning variety is the parrot tulip. These tulips are known for their ruffled petals and vibrant color combinations. With their flamboyant appearance, parrot tulips add a touch of drama and excitement to any garden.
If you’re looking for something a little different, consider double tulips. These tulips have extra petals, giving them a fuller and more luxurious look. With their intricate layers of petals, double tulips create a show-stopping display.
Fringed tulips are another unique variety worth mentioning. As the name suggests, these tulips have fringed or serrated edges on their petals, adding a touch of whimsy and charm to any garden. Their delicate fringes create an interesting texture that sets them apart from other tulip varieties.
Last but not least, lily-flowering tulips are a popular choice among gardeners. These tulips have long, slender petals that curve outward, resembling the shape of a lily. With their graceful appearance and elegant blooms, lily-flowering tulips bring a touch of sophistication to any landscape.
When choosing tulip bulbs, consider factors such as bloom time, height, and color to create a visually stunning display in your garden. Whether you prefer the classic elegance of single early tulips or the bold and vibrant colors of parrot tulips, there’s a tulip variety out there to suit every taste and preference.
Preparing for Planting
Proper preparation is key to successful tulip bulb planting. This involves selecting the right time to plant, choosing an ideal location, and preparing the soil.
Choosing the Right Time to Plant
Tulip bulbs are typically planted in the fall, about 6-8 weeks before the ground freezes. This allows the bulbs to establish roots before winter sets in. Planting too early can lead to premature growth, while planting too late may not give the bulbs enough time to root properly.
It’s important to check the climate in your area and follow the guidelines for planting tulips based on your specific region.
Selecting the Ideal Location
Tulips thrive in areas with full sun or light shade. Look for a location in your garden that receives at least 6 hours of sunlight per day. Avoid areas that are prone to standing water or have poor drainage, as this can cause the bulbs to rot.
Consider planting tulips in clusters or in rows along borders to create a visually striking effect.
Preparing the Soil
Before planting tulip bulbs, it’s crucial to prepare the soil properly. Start by removing any weeds or grass from the planting area. Loosen the soil to a depth of about 12 inches to ensure good drainage and root development.
You can also add organic matter, such as compost or well-rotted manure, to improve the soil’s fertility and structure. This will provide the bulbs with the essential nutrients they need to thrive.
The Planting Process

Once you’ve prepared the soil, it’s time to start planting your tulip bulbs. Here’s a step-by-step guide to help you through the process.
How Deep to Plant Tulip Bulbs
When it comes to planting tulip bulbs, the general rule of thumb is to plant them at a depth that is about three times the bulb’s height. This means that larger bulbs should be planted deeper than smaller ones.
On average, you’ll want to plant tulip bulbs about 6-8 inches deep. However, be sure to follow the specific planting instructions provided with your bulbs, as different varieties may have slightly different requirements.
The Right Spacing Between Bulbs
To allow for proper growth and prevent overcrowding, it’s important to leave enough space between each tulip bulb. A good guideline is to plant bulbs about 4-6 inches apart, depending on their size.
Keep in mind that tulips planted too close together can compete for resources and may not grow or bloom as well.
Watering and Fertilizing Newly Planted Bulbs
Once your tulip bulbs are in the ground, give them a thorough watering. This will help settle the soil and encourage the roots to establish themselves.
While tulips don’t require much fertilizer, you can topdress the soil with a balanced bulb fertilizer after planting to provide them with a boost of nutrients.
Caring for Tulips After Planting
After planting tulip bulbs, it’s important to provide ongoing care to ensure their health and longevity. Here are a few key tips to keep in mind.
Mulching and Protecting Bulbs in Winter
Once the ground freezes, apply a layer of mulch, such as straw or shredded leaves, to help insulate the soil and protect the bulbs from extreme temperature fluctuations.
It’s also important to protect your tulips from critters that may be tempted to dig up or eat the bulbs. Consider using wire mesh or repellents to deter animals such as squirrels and rabbits.
Pruning and Deadheading Tulips
After your tulips have finished blooming, it’s essential to deadhead them. Deadheading involves removing the faded flowers to prevent seed production and encourage the plant to focus its energy on bulb development.
Once the foliage turns yellow and starts to wither, you can trim it back to the ground. However, avoid cutting the foliage too early, as it needs time to photosynthesize and store energy in the bulb for next year’s growth.
Dealing with Pests and Diseases
Tulips can sometimes fall prey to pests and diseases, such as aphids, slugs, or fungal infections. Regularly inspect your plants for signs of damage or disease, and take appropriate measures to address the issue.
Avoid overwatering, as this can lead to root rot, and promptly remove any affected plant material to prevent the spread of disease.
By following these tips and techniques, you’ll be well on your way to planting tulip bulbs like a pro. With proper care and attention, your tulips will reward you with a stunning display of color and beauty year after year. Happy planting!