Shallots are a popular and flavorful addition to any garden. This step-by-step guide will walk you through the process of planting shallots and help you achieve a successful harvest. From understanding the different varieties of shallots to caring for your plants and harvesting your crop, we will cover it all. So let’s get started!
Understanding Shallots: An Overview

Before delving into the planting process, it’s important to have a good understanding of shallots and their origins. Shallots are a member of the onion family and are believed to have originated in Central Asia thousands of years ago.
Shallots have a long and fascinating history, dating back to ancient times. They were highly valued by the Egyptians, who considered them to be a sacred plant and used them in religious rituals. Shallots were also prized by the Romans, who believed that they had medicinal properties and used them to treat various ailments.
Today, there are several different varieties of shallots available, each with its own unique flavor and culinary uses. Some popular varieties include the French gray shallot, Dutch yellow shallot, and the red shallot.
The French gray shallot, also known as the Griselle shallot, is considered to be the most prized variety. It has a delicate, sweet flavor and is often used in gourmet cooking. The Dutch yellow shallot, on the other hand, has a stronger, more pungent flavor and is commonly used in everyday cooking.
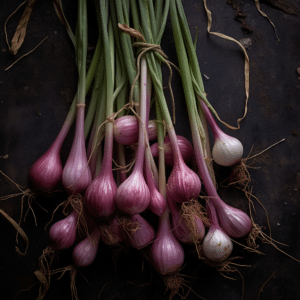
The red shallot, as the name suggests, has a reddish-purple skin and a milder, sweeter flavor compared to other varieties. It is often used in salads and pickling due to its attractive color and subtle taste.
Shallots are known for their unique taste, which is often described as a combination of onion and garlic. They have a milder flavor than onions and are often used to add depth and complexity to dishes without overpowering other ingredients.
In addition to their culinary uses, shallots are also known for their health benefits. They are rich in antioxidants, vitamins, and minerals, making them a nutritious addition to any diet. Shallots are also believed to have anti-inflammatory and antimicrobial properties, which can help boost the immune system and promote overall well-being.
When it comes to growing shallots, it’s important to choose the right variety for your climate and soil conditions. Shallots thrive in well-drained soil with plenty of organic matter. They prefer a cool, temperate climate and are typically planted in the fall for a spring harvest.
Planting shallots is relatively easy, but it requires some patience and attention to detail. The bulbs should be planted with the pointed end facing up, about 6 inches apart. They should be covered with about 1 inch of soil and watered thoroughly.
As the shallots grow, it’s important to keep the soil moist but not waterlogged. They should be fertilized regularly with a balanced fertilizer to promote healthy growth. Shallots are typically ready to harvest when the tops start to yellow and fall over.
Once harvested, shallots can be stored in a cool, dry place for several months. They can be used in a variety of dishes, including soups, stews, stir-fries, and salads. Shallots can also be pickled or used to make delicious homemade sauces and dressings.
In conclusion, shallots are a versatile and flavorful ingredient that adds a unique taste to a wide range of dishes. Whether you’re a seasoned chef or a home cook, understanding the origins and characteristics of shallots can help you make the most of this delicious ingredient in your culinary creations.
Essential Tools for Planting Shallots
Having the right tools is key to success when planting shallots. Here are some essential gardening tools you’ll need:
Choosing the Right Gardening Tools
When selecting gardening tools for planting shallots, opt for a hand trowel or fork for digging, a rake for preparing the soil, and a watering can or hose for watering your plants.
Having the right tools can make all the difference in your gardening experience. A hand trowel or fork is perfect for digging small holes to plant your shallots. Its sharp edge allows for precise and efficient digging, ensuring that you create the perfect environment for your shallots to grow. A rake, on the other hand, is essential for preparing the soil. By raking the soil, you remove any rocks, weeds, or debris that may hinder the growth of your shallots. This step is crucial as it helps create a clean and nutrient-rich bed for your plants. Lastly, don’t forget about watering your plants. A watering can or hose will allow you to provide your shallots with the necessary hydration, ensuring their healthy development.
Preparing Your Soil for Planting
Before planting shallots, it’s important to prepare your soil properly. Start by clearing the area of any weeds or debris. Then, loosen the soil with a rake and mix in some organic matter, such as compost or well-rotted manure. This will provide the shallots with the nutrients they need to thrive.
Clearing the area of weeds and debris is a crucial step in preparing your soil for planting shallots. Weeds compete with your shallots for nutrients and can hinder their growth. By removing them, you create a clean and weed-free environment for your shallots to flourish. Once the area is clear, it’s time to loosen the soil. Using a rake, gently break up any compacted soil to create a loose and friable texture. This will allow the shallot bulbs to establish their roots easily and access the nutrients they need. To further enhance the soil’s fertility, incorporate organic matter such as compost or well-rotted manure. These natural amendments will enrich the soil, providing a steady supply of nutrients to your shallots throughout their growth cycle.
The Planting Process: A Detailed Guide

Now that you have your tools and prepared soil, it’s time to dive into the planting process. Here’s a step-by-step guide:
When to Plant Shallots
Shallots are typically planted in the early spring or fall, depending on your climate. Ideally, the soil temperature should be around 50°F (10°C) for proper bulb development.
How to Plant Shallots
Start by digging small furrows or trenches in the prepared soil, about 1 inch deep. Place the shallot sets, which are small bulbs, about 6 inches apart in the furrows. Make sure the pointed ends are facing up. Cover the bulbs with soil, gently firming it around them.
Water the newly planted bulbs thoroughly, ensuring that the soil is evenly moist. This will promote root establishment. Keep in mind that shallots require consistent moisture throughout the growing season.
Caring for Your Shallot Plants
Once your shallots are planted, it’s important to provide them with proper care to ensure healthy growth. Here are some key care tips:
Watering and Fertilizing Shallots
Shallots prefer consistently moist soil, so be sure to water them regularly, especially during dry periods. Avoid over-watering, as this can lead to rot. Applying a balanced fertilizer every few weeks will also provide the necessary nutrients for robust growth.
Dealing with Pests and Diseases
Like other members of the onion family, shallots can be susceptible to pests and diseases. To ward off pests, consider using natural remedies such as companion planting or organic insecticides. Regularly inspect your plants for signs of disease, such as yellowing leaves or rot, and promptly remove any affected bulbs to prevent the spread.
Harvesting and Storing Shallots

After months of nurturing your shallot plants, it’s time to reap the rewards. Here’s how to harvest and store your shallots:
When and How to Harvest Shallots
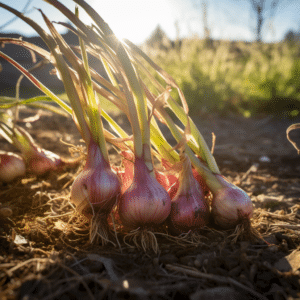
Shallots are typically ready to harvest when the foliage turns yellow and starts to dry out. Gently lift the bulbs from the soil using a garden fork or trowel. Allow them to air dry in a cool, dry place for a few weeks before storing.
Best Practices for Storing Shallots
To ensure that your shallots last as long as possible, store them in a cool, dark, and well-ventilated area. You can either hang them in mesh bags or store them in a shallow container with good airflow. Properly stored shallots can last for several months, allowing you to enjoy their delicious flavor well beyond the harvest season.
By following this step-by-step guide, you’ll be well on your way to planting, caring for, and harvesting a bountiful crop of shallots. Remember to provide your plants with the necessary care and attention they need, and soon you’ll be savoring the sweet and savory taste of freshly grown shallots in your favorite recipes.