Catnip, scientifically known as Nepeta cataria, is a perennial herb that is a member of the mint family. It is well-known for its effects on cats, who are drawn to its scent and often exhibit playful behavior when exposed to it. But did you know that growing catnip is a simple and rewarding process that you can do right in your own backyard or even indoors? In this guide, we will explore the steps to successfully grow catnip, as well as some tips and tricks to ensure a bountiful harvest.
Growing Catnip from Seeds
Starting catnip from seeds is a cost-effective way to grow a large amount of this herb. The process is straightforward and requires only a few basic gardening supplies.
First, you will need to purchase catnip seeds from a reputable supplier. Ensure that the seeds are fresh and of high quality to increase your chances of successful germination.
Step-by-Step Guide to Germination
Once you have your seeds, the next step is to germinate them. This process involves soaking the seeds to soften their outer shell and encourage sprouting.
Here’s a step-by-step guide on how to do it:
Soak the catnip seeds in water for 24 hours.
After soaking, drain the water and place the seeds on a damp paper towel.
Cover the seeds with another damp paper towel and place them in a plastic bag.
Seal the bag and place it in a warm, dark place.
Check the seeds daily for sprouts. Once they sprout, they are ready to be planted.
Planting Catnip
After your seeds have sprouted, it’s time to plant them. You can choose to plant your catnip outdoors in a garden or indoors in pots. Both methods have their advantages and considerations.
Regardless of where you choose to plant, ensure that the soil is well-draining. Catnip, like most herbs, does not like to sit in waterlogged soil. A mixture of garden soil, compost, and perlite or sand can create an ideal environment for your catnip to thrive.
Outdoor Planting
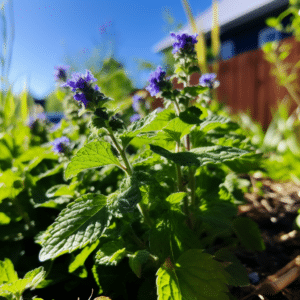
If you have a garden, planting catnip outdoors can be a great option. This herb loves full sun and can grow up to three feet tall, making it a beautiful addition to any garden landscape.
Here are the steps to plant catnip outdoors:
Choose a sunny location in your garden.
Prepare the soil by removing any weeds or rocks and adding compost if necessary.
Plant the sprouted seeds about 15 to 20 inches apart to give them room to grow.
Water the seeds well after planting, but be careful not to overwater.
Indoor Planting
Planting catnip indoors allows you to control the environment more closely. It’s also a great option for those who don’t have outdoor space.
Here’s how to plant catnip indoors:
Choose a pot with drainage holes and fill it with a well-draining soil mix.
Plant the sprouted seeds about an inch deep into the soil.
Place the pot in a sunny window where it will get at least six hours of sunlight each day.
Water the seeds well after planting, but be careful not to overwater.
Caring for Your Catnip
Once your catnip is planted, it’s important to provide it with proper care to ensure healthy growth. This includes regular watering, occasional fertilizing, and proper pest management.
Water your catnip regularly, but be careful not to overwater. The soil should be kept moist, but not waterlogged. Overwatering can lead to root rot, which can kill your plant.
Fertilizing Your Catnip
Catnip is not a heavy feeder, but it can benefit from occasional fertilizing. A balanced, slow-release fertilizer can be applied in the spring to promote growth.
Be careful not to over-fertilize, as this can lead to excessive growth and a decrease in the potency of the catnip’s scent and flavor.
Pest Management
Catnip can attract a variety of pests, including aphids, whiteflies, and spider mites. Regularly inspect your plants for signs of pests and treat them with an organic pesticide if necessary.
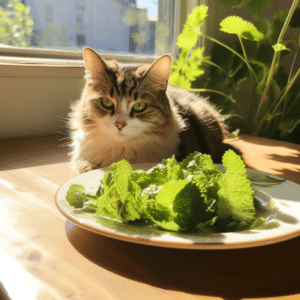
Additionally, if you have cats, they may be attracted to your catnip plants. To prevent them from damaging your plants, consider planting catnip in a protected area or providing your cats with their own pot of catnip to enjoy.
Harvesting and Storing Catnip
Once your catnip plants have matured, they can be harvested and used fresh or dried for later use. The best time to harvest catnip is in the late morning, after the dew has dried but before the heat of the day.
To harvest, simply cut the stems of the plant, leaving a few inches for regrowth. The leaves and flowers can be used fresh, or they can be dried and stored for later use.
Drying and Storing Catnip
Drying catnip is a simple process. Simply tie the harvested stems together and hang them upside down in a warm, dry, dark place. Once the leaves are completely dry, they can be stripped from the stems and stored in an airtight container.
Stored properly, dried catnip can retain its potency for up to a year. It can be used to make catnip toys, teas, or as a flavorful addition to certain recipes.
Conclusion
Growing catnip is a rewarding process that can provide you with a plentiful supply of this beloved herb. Whether you’re growing catnip for your feline friends, for its medicinal properties, or simply for its beauty in the garden, following these steps will ensure a successful harvest.