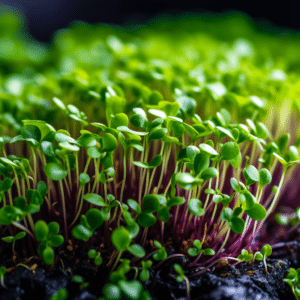
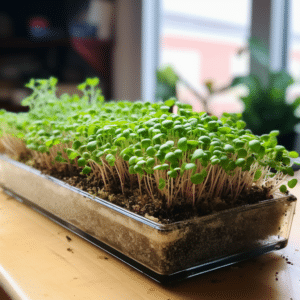
Growing microgreens indoors is a rewarding and convenient way to add fresh and nutritious greens to your diet. Whether you are a seasoned gardener or a beginner, this step-by-step guide will walk you through the process of cultivating microgreens in the comfort of your own home. From understanding the benefits of microgreens to troubleshooting common growing problems, this comprehensive guide has got you covered.
Understanding Microgreens and Their Benefits

The world of microgreens is a fascinating one, filled with vibrant colors, distinct flavors, and crisp textures. These young vegetable greens are harvested just a few weeks after germination, making them a true delicacy. But what exactly are microgreens, and why are they considered a superfood?
What Are Microgreens?
Microgreens are not your average greens. They are the tiny, tender shoots of vegetables and herbs that are harvested at an early stage of growth. These miniature versions of their fully grown counterparts are packed with nutrients and bursting with flavor. From the moment they sprout, microgreens are nurtured with care until they reach the perfect stage for harvest.
These greens come in a variety of colors and shapes, ranging from vibrant reds and purples to delicate greens and yellows. Each variety of microgreen has its own unique taste profile, adding a burst of flavor to any dish.
Nutritional Value of Microgreens
While microgreens may be small in size, they are mighty in terms of nutritional value. Research has shown that these tiny greens can contain up to 40 times more nutrients than their fully grown counterparts. This makes them a valuable addition to any diet, offering a concentrated dose of vitamins, minerals, and antioxidants.
One of the key benefits of microgreens is their high levels of vitamins A, C, and K. These vitamins play essential roles in maintaining overall health and supporting various bodily functions. Additionally, microgreens are rich in minerals like iron, zinc, and potassium, which are vital for maintaining a balanced diet.
Not only are microgreens packed with essential nutrients, but they also offer a range of health benefits. The antioxidants found in these greens help protect the body against free radicals, reducing the risk of chronic diseases. They also support healthy digestion, boost the immune system, and promote healthy skin.
So, whether you’re looking to add a burst of flavor to your meals or boost your nutrient intake, microgreens are a fantastic choice. These miniature greens offer a world of possibilities, both in terms of taste and health benefits. Incorporate them into your diet and experience the wonders of microgreens!
Necessary Tools and Materials for Growing Microgreens

Choosing the Right Seeds
When selecting seeds for your microgreens, opt for varieties that are specifically labeled for microgreen production. These seeds are typically untreated, ensuring optimal germination and growth. Popular choices include broccoli, kale, radish, and sunflower seeds, among others. Be sure to consider the flavor profile and colors you desire when choosing your seeds.
Broccoli microgreens, for example, are known for their mild and slightly spicy flavor, while kale microgreens offer a more earthy and robust taste. Radish microgreens, on the other hand, provide a peppery kick, and sunflower microgreens have a nutty and crunchy texture. Experimenting with different seed varieties can add a delightful range of flavors and textures to your dishes.
Additionally, consider the nutritional benefits of different microgreens. Broccoli microgreens, for instance, are rich in vitamins A, C, and K, as well as fiber and antioxidants. Kale microgreens are packed with vitamins A, C, and K, as well as calcium and iron. By selecting a diverse range of seeds, you can create a microgreen garden that not only adds flavor but also boosts the nutritional value of your meals.
Selecting the Ideal Soil
The ideal soil for growing microgreens should be lightweight, well-draining, and rich in organic matter. One common option is to use a sterile seed-starting mix or a blend of peat moss and vermiculite. These materials provide a loose and airy texture, allowing the microgreen roots to penetrate easily and access nutrients.
Another alternative is to use coconut coir, a sustainable and renewable medium made from coconut husks. Coconut coir retains moisture well while still providing excellent drainage, creating an ideal environment for microgreen growth.
It’s important to note that the soil used for microgreens should be free from any contaminants or pathogens that could hinder their growth. Using garden soil is not recommended as it can contain pests and diseases that may affect the health and development of your microgreens. Opting for a sterile or specially formulated mix will help ensure a clean and disease-free growing environment.
Importance of Proper Lighting
Light is crucial for the healthy growth of microgreens. Place your trays of microgreens near a sunny window or use artificial lighting such as grow lights. If using artificial lighting, position the lights 2-4 inches above the trays and keep them on for 12-16 hours a day. This will ensure that your microgreens receive adequate light for photosynthesis and will prevent them from becoming elongated and leggy.
When positioning your trays near a window, consider the direction of sunlight throughout the day. South-facing windows generally receive the most sunlight, while north-facing windows receive the least. East and west-facing windows provide moderate light levels. Adjust the placement of your trays accordingly to maximize the exposure to natural light.
If relying solely on artificial lighting, it’s important to choose the right type of grow lights. LED grow lights are a popular choice for microgreen growers as they are energy-efficient and emit the specific wavelengths of light that plants need for photosynthesis. They also produce less heat, reducing the risk of overheating your microgreens.
Proper lighting not only ensures healthy growth but also influences the color and appearance of microgreens. Adequate light exposure promotes the development of vibrant green leaves and prevents the microgreens from stretching towards the light source, resulting in sturdier and more visually appealing plants.
Step-by-Step Guide to Planting Microgreens

Preparing Your Soil and Seeds
Begin by filling your trays or containers with your chosen soil mix, leaving a small gap at the top. Moisten the soil lightly by misting it with water. Sprinkle your chosen seeds evenly across the surface of the soil, ensuring that they are not overcrowded. Gently press the seeds into the soil using the back of a spoon or your fingertips. Cover the seeds with a thin layer of soil and mist the surface again to moisten.
Planting Your Seeds
Once your seeds are planted, cover your trays with a clear plastic lid or use plastic wrap to create a mini greenhouse effect. This will help retain moisture and create an ideal germination environment. Place your trays in a warm spot with consistent temperatures between 60-75°F.
Caring for Your Growing Microgreens
Over the next few days, mist the soil surface daily to keep it moist. Avoid overwatering, as excessive moisture can lead to mold and fungus growth. As soon as your microgreens start to emerge, remove the covers and place the trays under proper lighting. Continue to mist the greens lightly once or twice a day.
Harvesting and Storing Your Microgreens
When and How to Harvest Microgreens
Microgreens are ready for harvest when they have developed their first true leaves, usually within 1-3 weeks after planting. To harvest, use a pair of scissors to cut the greens just above the soil level. Rinse the harvested microgreens gently and allow them to air dry. Enjoy the fresh and vibrant microgreens immediately or store them properly for later use.
Best Practices for Storing Microgreens
To extend the shelf life of your harvested microgreens, store them in an airtight container lined with a paper towel or a dry cloth to absorb excess moisture. Place the container in the refrigerator, where the microgreens can stay fresh for up to a week. Remember to rinse your microgreens before consuming to remove any residual dirt or debris.
Troubleshooting Common Microgreen Growing Problems
Dealing with Mold and Fungus
If you notice mold or fungus growth on your microgreens, adjust your watering practices and ensure proper air circulation. Water from the bottom of the tray rather than from the top to prevent excessive moisture on the leaves. If the issue persists, consider using a hydrogen peroxide solution to control the mold and fungus growth.
Addressing Poor Germination
If your microgreens are experiencing poor germination, check the freshness of your seeds. Some seeds may have a lower viability rate, and older seeds may have reduced germination rates. Additionally, ensure that you are providing the optimal temperature and humidity for germination. Consider pre-soaking your seeds in water before planting to improve germination rates.
Overcoming Lighting Issues
If your microgreens appear elongated and stretched, it may indicate insufficient lighting. Adjust the height and intensity of your grow lights to provide adequate light exposure. Alternatively, place your trays near a sunny window with direct sunlight. Remember to rotate your trays regularly to ensure even growth and prevent leaning towards the light source.
Now that you have a step-by-step guide to growing microgreens indoors, you can enjoy fresh and nutritious greens year-round. Experiment with different seed varieties and flavors to create a diverse selection of microgreens to incorporate into your meals. Happy cultivating!