Are you an avid gardener looking to take on a new challenge? Or perhaps you’re a pumpkin enthusiast who dreams of growing your own giant pumpkin for Halloween or a fall harvest festival? Whatever your reason, growing giant pumpkins can be an exciting and rewarding endeavor. In this guide, we’ll walk you through the process step by step.
Understanding the Basics of Pumpkin Growth
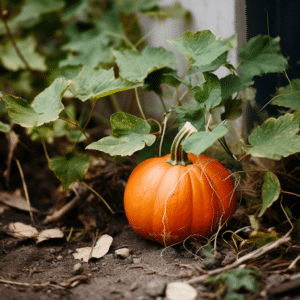
Before you start planting, it’s important to understand the basics of pumpkin growth. Pumpkins are a type of squash and belong to the Cucurbitaceae family, which also includes cucumbers, melons, and gourds. They are warm-season vegetables and thrive in conditions where temperatures range between 75 and 85 degrees Fahrenheit.
Pumpkins have a long growing season, typically between 90 and 120 days, depending on the variety. Giant pumpkins, in particular, require a longer growing season and more care and attention than regular pumpkins. They can take up to 130 days to reach their full size.
Choosing the Right Variety
Not all pumpkins are created equal when it comes to size. If you want to grow a giant pumpkin, you’ll need to choose a variety that’s known for its size. The most popular variety for giant pumpkins is the ‘Atlantic Giant’. This variety holds the record for the largest pumpkin ever grown, which weighed in at over 2,600 pounds.
Other varieties that are known for producing large pumpkins include ‘Big Max’, ‘Prizewinner’, and ‘Mammoth Gold’. These varieties can produce pumpkins that weigh between 100 and 200 pounds, making them a good choice if you’re new to growing giant pumpkins.
Preparing the Soil
Pumpkins are heavy feeders, which means they require rich, fertile soil to grow. The soil should be well-draining and have a pH between 6.0 and 7.0. If your soil is too acidic or alkaline, you can amend it with lime or sulfur to adjust the pH.
Before planting, prepare the soil by adding plenty of organic matter, such as compost or well-rotted manure. This will improve the soil’s fertility and drainage, and provide the pumpkin plants with the nutrients they need to grow.
Choosing the Right Location
Pumpkins require a lot of space to grow, especially giant varieties. Each plant can spread out over 500 to 1,000 square feet, so make sure you have enough room in your garden. Choose a location that gets at least six hours of direct sunlight each day. The more sun your pumpkins get, the bigger they will grow.
When choosing a location, also consider the wind. Pumpkins are susceptible to wind damage, so choose a location that’s sheltered from strong winds. If you live in a windy area, consider building a windbreak to protect your plants.
Planting and Caring for Your Pumpkins
Once the soil is prepared and you’ve chosen the right location, it’s time to plant your pumpkins. Plant the seeds in hills or mounds of soil, about 1 inch deep. Each hill should be about 4 to 6 feet apart to give the plants plenty of room to spread out.
After planting, water the seeds thoroughly. Pumpkins require a lot of water, especially during dry periods. However, it’s important to avoid overwatering, as this can lead to root rot and other diseases.
Fertilizing Your Pumpkins
As mentioned earlier, pumpkins are heavy feeders and require a lot of nutrients to grow. Fertilize your plants regularly with a high-nitrogen fertilizer until the flowers start to form. After that, switch to a high-phosphorus fertilizer to encourage fruit development.
It’s also a good idea to do a soil test before planting and again mid-season to ensure your plants are getting the nutrients they need. If the soil test shows a deficiency in any nutrients, you can amend the soil accordingly.
Pruning and Training Your Pumpkins
To grow a giant pumpkin, you’ll need to prune and train the plant. This involves removing all but one or two fruits per plant and directing the plant’s energy into growing these fruits. You’ll also need to train the vines to grow in a certain direction to prevent them from taking over your garden.
Pruning and training should be done carefully to avoid damaging the plant. Use a sharp, clean pair of pruning shears and make clean cuts. After pruning, apply a fungicide to the cuts to prevent disease.
Harvesting Your Giant Pumpkins
When it’s time to harvest your giant pumpkins, be careful not to damage the fruit or the vine. Use a sharp knife to cut the stem, leaving several inches attached to the pumpkin. Never lift a pumpkin by its stem, as it can easily break off.
After harvesting, allow the pumpkin to cure in the sun for a few days to harden the skin. This will help the pumpkin last longer and prevent rot. Once the pumpkin is cured, store it in a cool, dry place until you’re ready to use it.
Entering Your Pumpkin in a Competition
If you’ve grown a particularly impressive pumpkin, you might consider entering it in a giant pumpkin competition. These competitions are held all over the world and offer cash prizes for the largest pumpkins. Before entering, make sure to check the rules and regulations of the competition, as they can vary.
Whether you’re growing giant pumpkins for fun, for competition, or just to impress your neighbors, the process can be a rewarding and educational experience. With a little patience, care, and a lot of sunlight, you’ll be on your way to growing your own giant pumpkins in no time.