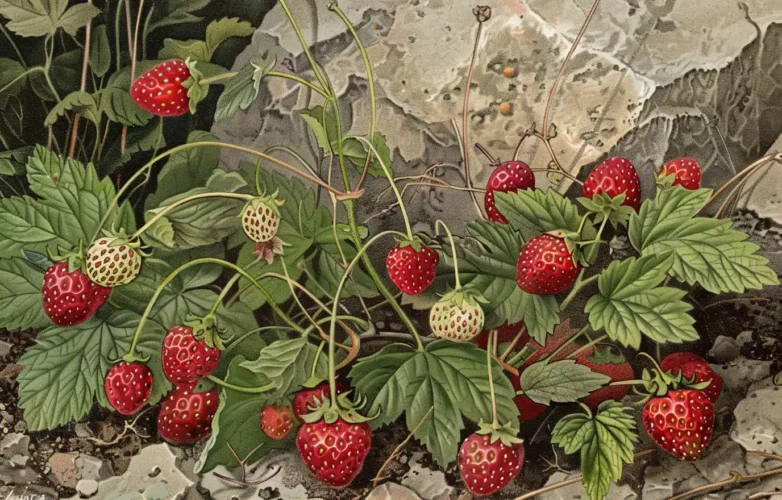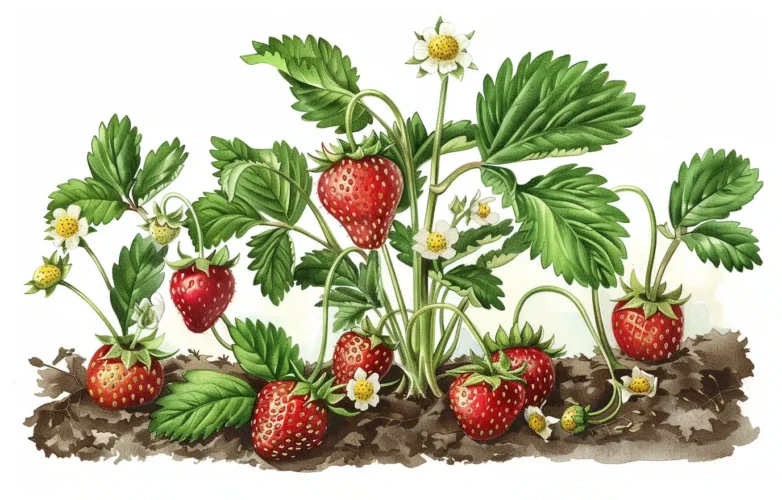
Have you ever tried a fresh picked strawberry? If not, I would argue that you've never actually tasted a strawberry! Strawberries (fragaria chiloensis from the rosaceae family) are amongst the most popular fruit grown by hobby gardeners and homesteaders alike. Strawberry plants can be grown almost anywhere, produce fruit quickly, are easy to grow, great for kids, and offer an inexpensive alternative to store-bought fruit. They can be enjoyed in a variety of ways from fresh to frozen. If you have children, then trust us when we say that there really is no such thing as having "too many" strawberry plants.
We know what you're thinking: "If growing strawberries is so easy, then why is this article so long?" Don't let the length of this article fool you, strawberries are really some of the easiest fruit to grow (check out our month-by-month strawberry growing calendar for an overview of the process). However, everyone wants to know how to grow massive quantities of the biggest, juiciest, sweetest strawberries possible (after all, who wants teeny tiny berries?). Well, growing strawberries of that magnitude requires a little more patience and advanced growing tips and we've included all of those details in this article as well. Happy growing!
Snapshot: How to Grow Strawberries
Types of Strawberries:
Junebearing, Everbearing & Day Neutral, Alpine.
When to Plant:
Start seeds indoors 4 months before the last spring frost. Bare root plants and transplants should be sowed in early spring (Northern climates) when the ground is workable or in the fall (Southern climates).
How to Plant:
Transplant strawberries in a hole deep enough to keep the roots straight (avoid creating bent "J" shaped roots). Backfill firmly with soil up to just below the plant's crown.
Plant Spacing:
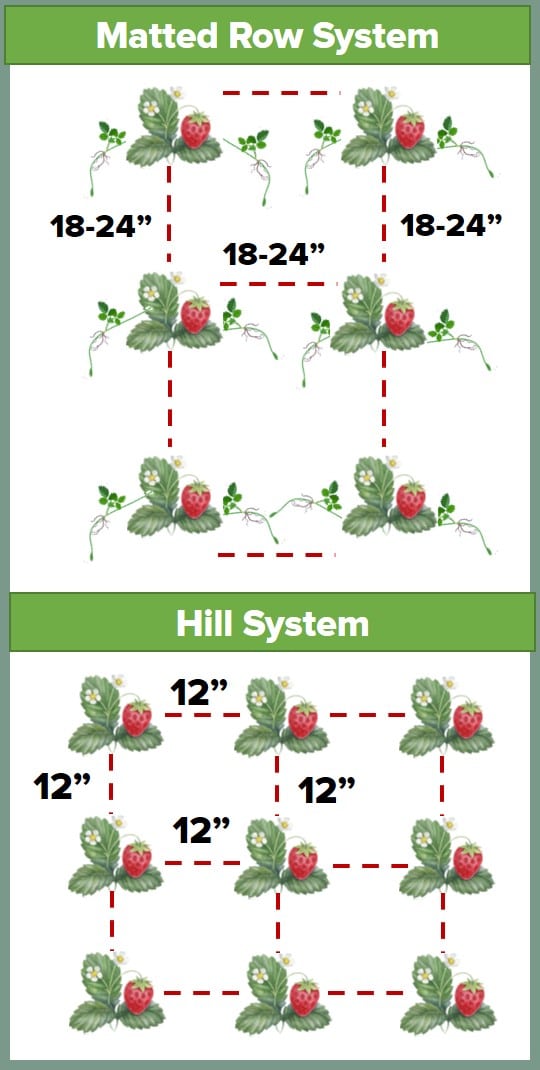
Choose either a "Matted Row, "Hill System," or container strategy. Space plants 12-18 inches apart in-ground or 3-4 plants per square foot in containers.
Germination:
Strawberry seeds germinate within 1-5 weeks of sowing (depending on the variety). Bareroot plants and potted plugs are pre-germinated.
Best Soil:
Nutrient rich, well-draining, slightly acidic soil (pH 6-6.5) with soil temperatures between 60-75 degrees.
Watering:
Strawberry plants need 1 inch of water per week (up to 2 inches per week while fruiting).
Sunlight:
Strawberries love the sun! Provide 8 hours+ of daily sunlight.
Fertilizer:
Optional if strawberries were planted in amended soil. Side dress with compost, aged manure, or blood meal.
Companion Plants:
Best strawberry companion plants are borage, dill, bush beans, lavender, alyssum, yarrow, onions, garlic, and fennel. Worst companions include cabbage, potatoes, tomatoes, peppers, and roses.
Harvesting:
Plants reach maturity approximately 30 days after blooming. Harvest berries when they turn deep red.
Strawberry Basics: Know Before You Grow
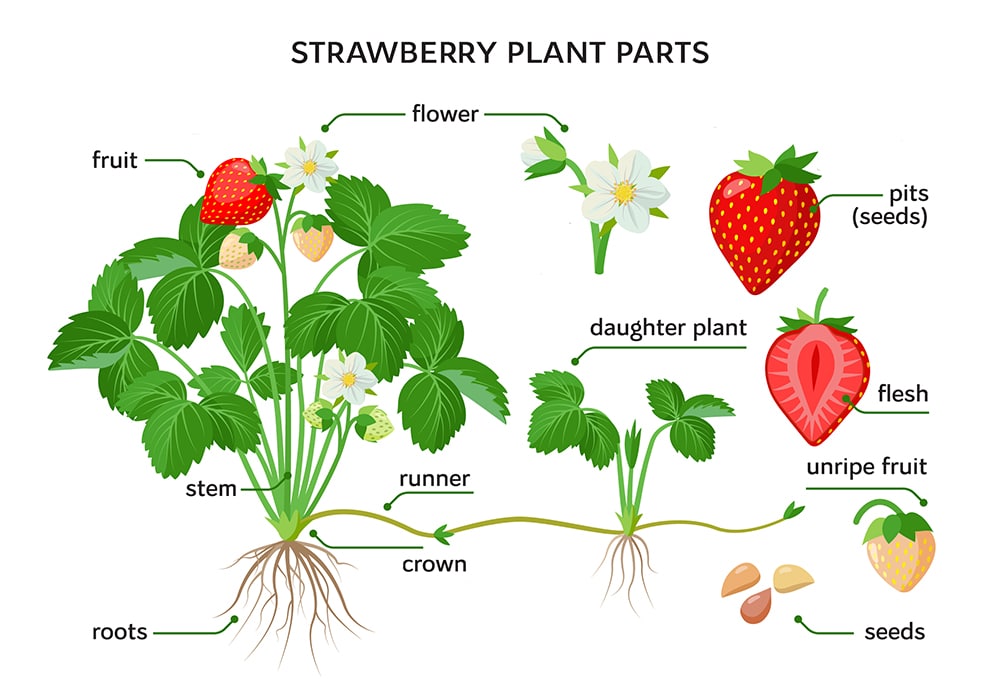
Before we get started, it is important to understand a bit about strawberry varieties and how they grow. Strawberries can be grown as perennials in USDA zones 5-8 and annuals in zones 9-10. Colder zones (4 and below) can grow strawberries as perennials with added frost protection such as heavy mulch and row covers. Additionally, strawberries are categorized into three varieties based on their fruiting behavior: Junebearing and Everbearing/Day Neutral. While strawberries can be grown in almost any climate, yearly maintenance and care differs depending on the variety of strawberry chosen.
Junebearing Strawberries:
Junebearers are the most common commercial strawberry variety. These plants produce a single large crop of strawberries around mid-summer (June/July); hence, where they get their name "June" bearer. Junebearers offer the largest yield, biggest berries, and most runners of any other variety. Because these plants produce a lot of runners, they are best suited for the "Matted Row" system of spacing.
Everbearing Strawberries:
Everbearing strawberry varieties produce two crops each year: one in early summer and another in early fall. Although each crop is smaller than a single Junebearing crop, Everbearers allow you to enjoy fresh strawberries throughout the growing season. These berries are best for containers and the "Hill System" of spacing because they produce few runners.
Day Neutral Strawberries:
Day Neutral strawberries will continuously produce fruit throughout the growing season as long as the temperatures remain between 35-85°F. These varieties produce smaller fruit, have less runners, and offer more opportunities for continuous harvests than June and Everbearing varieties. Best suited for the "Hill System" of planting.
Woodland Alpine Strawberries:
Alpine strawberries are technically a kind of Day Neutral berry, but are often sold as ground-cover for edible landscapes. These varieties produce small crops of tiny berries throughout the growing season and are more adaptable to shady locations. Unlike strawberry cultivars, alpine strawberries are often direct-sown and germinated from seed.
We've found that one of the best ways to enjoy strawberries all season long is to plant a few different cultivars. Combining June- and Everbearing plants in your garden will ensure a large and continuous harvest throughout the summer months. Sprinkling a few Alpine strawberry varieties in shadier locations will provide delicious edible landscaping until deep fall. Junebearing strawberry plants are available in early, mid-season, and late season varieties--allowing you to extend your harvests even more! Check out the section on "How to Buy Strawberries" for a comprehensive list of strawberry types.
Getting Started: Seeds vs Roots vs Plants
Can you grow strawberry plants from seed? Yes. Should you? Well, that depends. If you've purchased a packet of strawberry seeds (typically an Alpine variety) and have a lot of patience, then strawberry seeds may be the way to go. However, if you want to enjoy fruit asap, then you may be better off purchasing a potted strawberry plant or bareroot plant.
Potted strawberry plants (or plugs) have intact root balls and, thus, come already pre-potted in soil. They are easier to plant, but cost a bit more than bareroot starts. Bareroot plants have exposed root systems (no soil) that are kept and sold in a dormant state. These roots are then planted in the spring and being blossoming shortly after. Strawberry seeds are sold in Alpine or wild varieties which produce small berries and are typically used as edible ground cover.
Gardeners usually grow strawberry cultivars from bareroot or plug starts because they offer a head start vs seedlings and produce a heavy crops of big berries shortly after planting. It is not recommended to start strawberries from seed other than alpine varieties because strawberry seeds are difficult to start, have poor germination rates, and often do not provide much fruit in their first year. Here is a quick guide to growing strawberries from seed:
How to Grow Strawberries from Seed

There are two options for starting alpine strawberry seeds: indoors or direct-sow. While direct sow (i.e. planting the seeds directly in the garden in early spring) is the easiest method, the plants may not mature fast enough to produce an initial crop. If you'd like to guarantee a first-season crop from your alpine strawberry seeds--it's best to start your strawberry seeds indoors as follows:
Start Early:
In addition to a minimum 30 day cold stratification period, strawberry seeds also need up to 5 weeks to germinate and 6-8 weeks of growth before transplanting outdoors. For this reason, it is recommended to start seeds indoors 4 months before the last frost. (Note: some alpine varieties can be direct sown in early spring. Check your seed packet for more details).
Cold Stratification:
Strawberries must have a period of cold before they can germinate. Cold stratification is the process of exposing seeds to a cool, moist environment. This process mimics the fall, winter, spring cycle that these perennial seeds need to germinate. Place seed packet (or place loose seeds in an envelope) in an airtight bag and again into an airtight jar. The extra layers will protect the seeds from excess moisture. Keep this jar in the refrigerator for about one month. When ready to sow, allow the jar to return to room temperature before planting.
Sow Shallowly & Wait Patiently:
Prepare a seed tray with lightweight seed starting mix and gently press a single strawberry seed into each cell and cover shallowly. Water lightly and keep moist until germination within 1-5 weeks. Light aids strawberry seed germination, so place your seedling trays in a sunny spot or under a grow light.
Pot Up Until Ready:
As seedlings emerge and begin to grow, identify your strongest plants and pot them up from cell packs into a 2-4" container or biodegradable pot. When seedlings are 2-3" tall (and the last spring frost has passed), harden off and transplant outdoors according to the instructions below.
- Sun Gro: Black Gold Organic Seedling Starter Mix: A light, fluffy, organic seedling starting mix that allows seedlings to get the light they need to germinate.
- Seed Starter Tray with Humidity Dome: An all-in-one seed starting set complete with humidity dome for early germinating.
- Seedling Starting Heat Mat: Germinate your strawberry seeds fast by keeping their soil at the perfect temperature with a easy-to-use heat mat.
- Indoor LED Grow Lights: Strawberry seeds need light for germination. These easy-to-install indoor LED grow lights can be used to ensure successful germination in any lighting environment.
Growing Strawberries from Transplants & Bare Roots
Whether you've started your strawberries from seed or purchased transplants, early spring is the time to plant your strawberry plants in their final home. Strawberry plants can be planted in raised garden beds, containers, gardens, and even as ground cover. This section covers the process of actually planting your strawberry plants into the ground, but you'll still need to continue reading to learn more about plant spacing and soil preparation.
Rehydrate Plants:
If you've purchased a plant/plug from a nursery, skip this step. For bareroot strawberries, gently loosen up the soil from around each root ball and soak the roots in a bucket of water for a few minutes to rehydrate them.
Amend the Soil:
Prepare your strawberry bed by adding nutrient dense amendments such as compost, aged manure, worm tea, or a nitrogen-rich berry blend. Turn these amendments under the soil lightly as strawberries have shallow root systems.
Avoid Bent "J" Roots
Dig a hole large enough to accommodate the entire root system of your strawberry plant. Take special care not to bend the strawberry roots into a "J" shape as you plant them. The easiest way we've found to do this is to simply hold the plant in the correct position in the hole with one hand and backfill quickly with the other hand. Once there is enough soil in the hole to keep the roots in position, use both hands to firmly press more soil around the plant. Water plants thoroughly.
Protect the Crown:
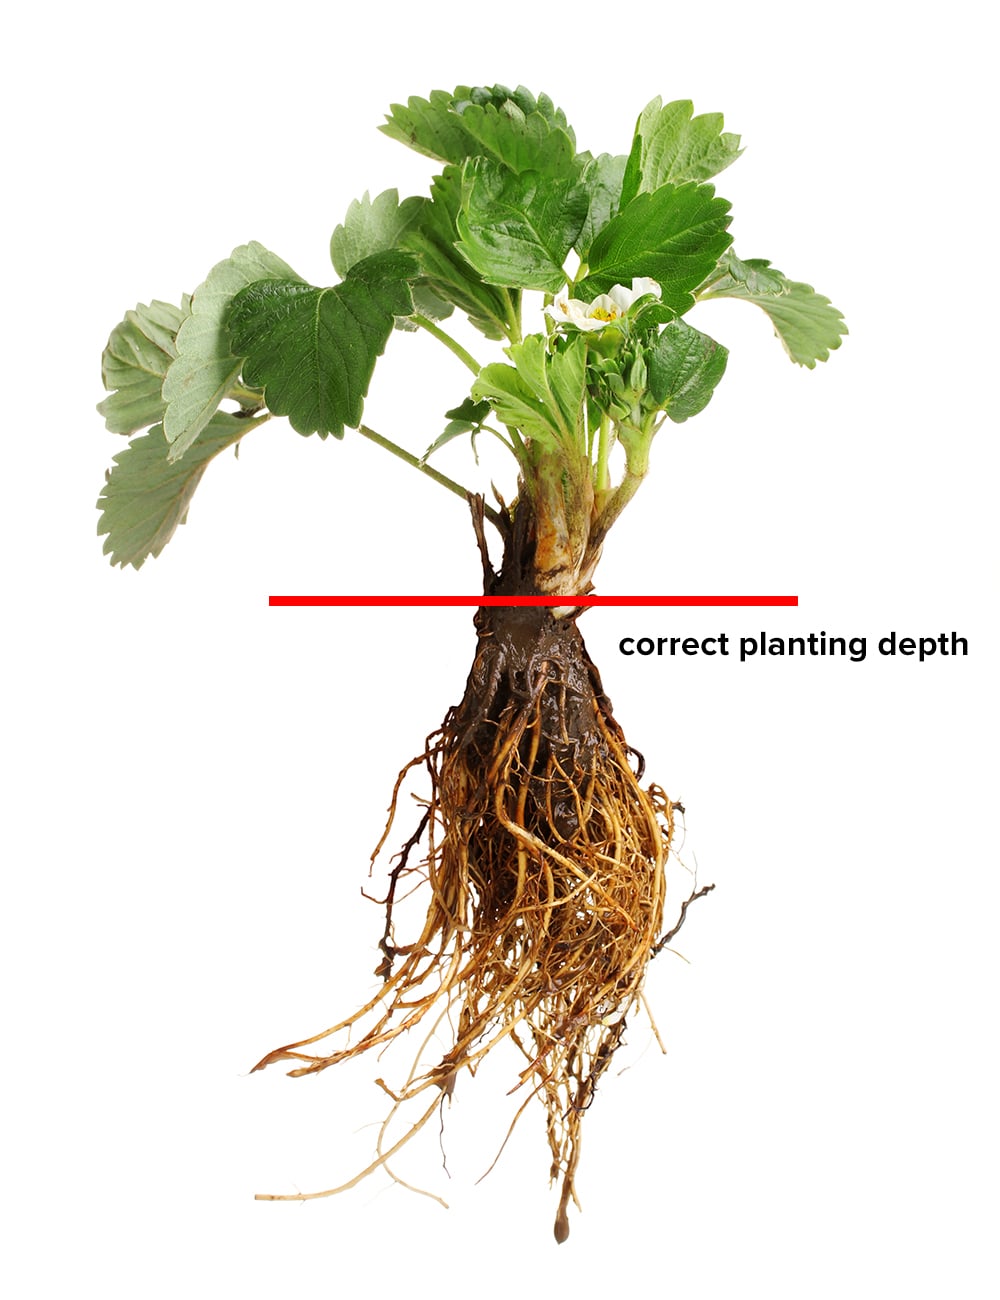
Plant your strawberries so that the crown rests at or just above the soil line. The crown is the fleshy bulb that sits just above the root system. This is where new growth emerges from and plants will die if the crown is covered. While this may sound tricky, it is really simple to do! Examine your plant and notice where the brown root system ends and the fleshy white stem-like part begins--this is roughly where you want your soil level to be.
Heeling In Bareroot Strawberry Plants
Sometimes, your bareroot strawberry plants will arrive before you are ready to plant them. If you'd like to plant your strawberries at a later date, you must "heel in" your plants and keep them alive, yet in a dormant state. To do this, simply cover the roots in a moist medium (such as sand, sawdust, or soil) and keep them in a dark location which maintains a temperature between 38°-45°F (like a basement, root cellar, or unheated garage).
Technically, you should be able to keep plants heeled in for several weeks if the ideal conditions are maintained. We've personally kept strawberries dormant for almost 3 months by covering the roots in moist sawdust and storing them in an unheated garage during the winter months. Check on your plants often to ensure that the roots never dry out and the temperature remains cool. If your roots begin to dry, use a spray bottle to remoisten.
How Long Does it Take for Strawberries to Grow?
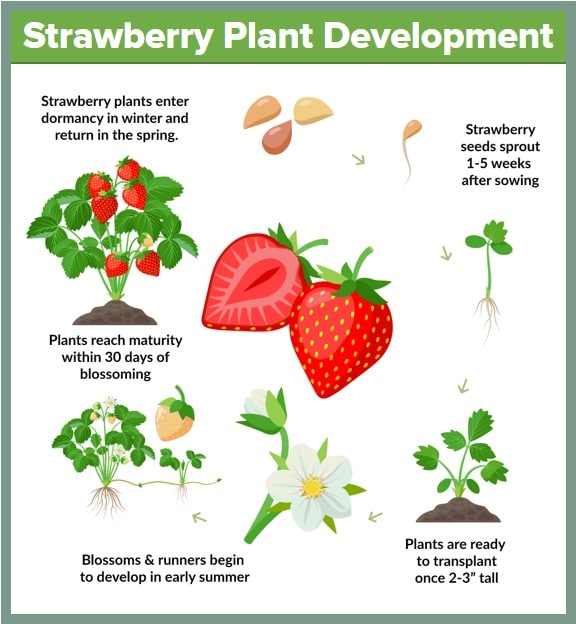
Strawberry seeds are slow to germinate and can take as long as 1-5 weeks after sowing to sprout (refer to your seed packet for a variety specific timeline). Once germinated, strawberry plants will continue to grow for a few weeks until they reach a height of 2-3" tall (how long this takes depends on the growing environment of the seedlings). At that time, the plants are ready to be hardened off and transplanted outdoors--typically in early spring. Within the first week of spring planting, strawberry plants will produce new roots and leaves. By early summer, strawberry plants will have developed runners and blossoms. Approximately one month after blossoming, strawberries reach maturity and fruit can be harvested. After harvest, strawberry plants descend into dormancy as temperatures and sunlight dwindle in the Autumn months. Plants will readily lose their leaves and remain dormant until early spring when average temperatures and daylight hours begin to rise.
Strawberry Plant Spacing: Matted Row vs Hill System
Now that you know how to plant a single strawberry plant, let's learn how to plant multiple plants to create a productive strawberry patch. Strawberry plants propagate via "runners." Whether you like it or not, your strawberry patch will expand wildly in all directions without some advanced planning. There are two common systems for managing runners: the Matted Row and the Hill System. These systems are simple tried-and-true spacing techniques for growing large quantities of strawberry plants. However, once you understand the basics of what each system is trying to accomplish, you can modify them to better accommodate your specific space and gardening goals.
Matted Row Layout:
The Matted Row system spaces strawberry plants far apart and allows the runners to propagate and fill the gaps. At first, your strawberry patch will look bare, the runners will quickly take over and create an interwoven (or "matted") patch. Because this system relies heavily on runners, it is best suited for Junebearing strawberry varieties; although, it can be done in smaller space with everbearing varieties as well. The most common spacing recommendation for a matted row is 3ft wide planting rows spaced 3-4ft apart, with plants spaced 18-24" inches within each row.
Hill System Layout:
The Hill System spaces strawberries closer together and removes all runners. By removing the runners, each individual strawberry plant grows larger/taller--resembling a "hill." Contrary to popular belief, the "hill" system has nothing to do with planting strawberries in a hill of soil (although, this is a helpful strategy for better drainage in low-lying areas). The most commonly recommended spacing for hill system strawberry patches is 1-3ft rows, spaced 14 inches apart, with plants spaced 10-12 inches apart within the rows.
Combination Spacing:
You don't have to choose one system over another. In fact, you could employ a combination system where you prune some runners and let some runners propagate. There is no hard and fast rule, so choose an approach that works best for your particular gardening situation.
Growing Strawberries in Containers
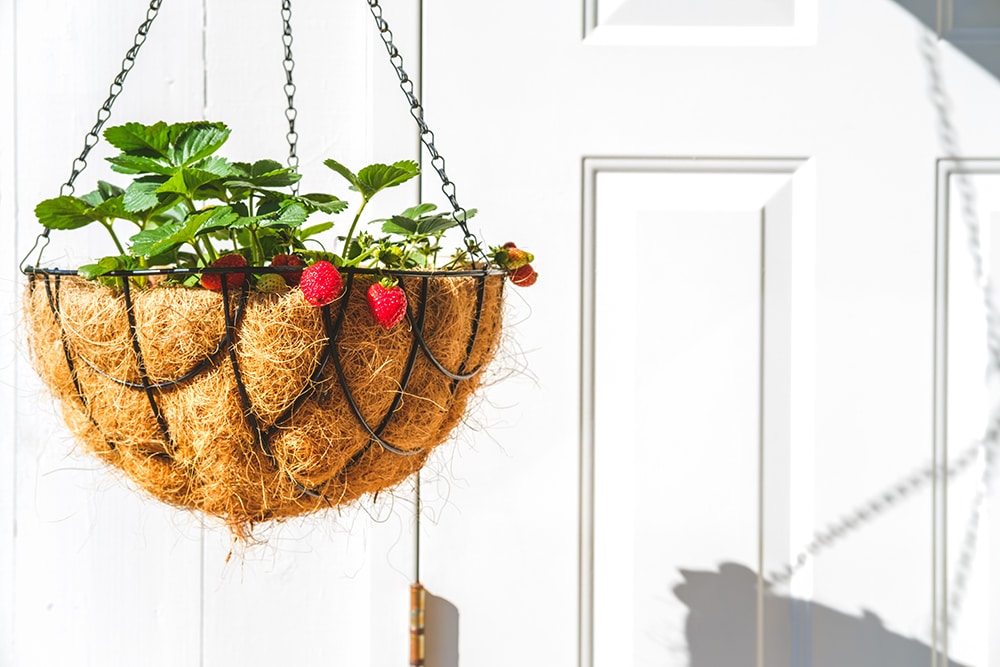
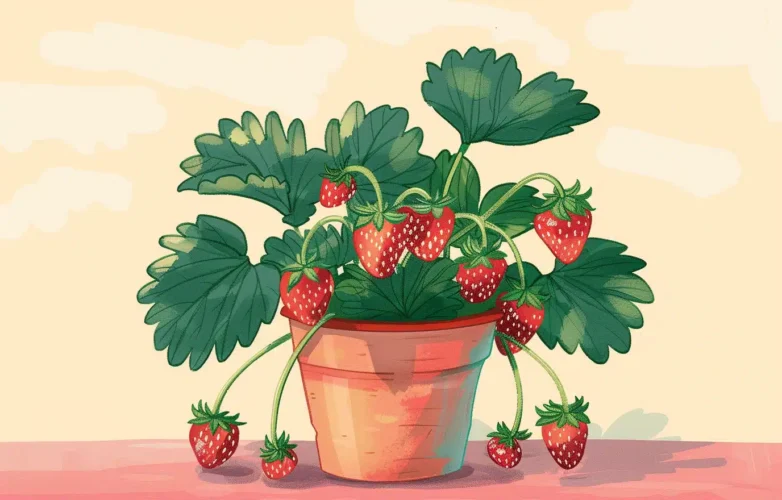
Strawberries grow abundantly in containers and there is no sweeter treat than a fresh berry grown on a sunny windowsill. You don't need any special container (although, there are some specialty containers for strawberries that are fun), but good drainage and lots of sunlight are musts. In addition to many of the tips in this article, here's some specific advice on how to get large harvests from container strawberries:
Choose Container-Friendly Strawberries:
Any strawberry variety can be grown in containers; however, some varieties are better suited for pots and raised beds than others. Everbearing and Day Neutral varieties produce few runners: making them low maintenance choices for small spaces. Day Neutral varieties can tolerate vastly more shade than Everbearers and Junebearers: making them attractive options for low-light environments. Junebearers can be grown in containers, but work best in large raised beds where runners are allowed to propagate.
Choose a Sunny Location:
You can have a blockbuster harvest from strawberries grown in containers so long as they get adequate sunlight each day. If strawberries cannot be grown on a deck or balcony, then be sure to place the container at the sunniest window indoors (you may have to move your strawberry plants throughout the day in order to ensure at least 6-8 hours of sunlight daily).
Use Rich Potting Soil:
Strawberries are heavy feeders, but they don't enjoy frequent fertilization during the growing season. The best way to feed your container strawberries at the start with a nutrient-dense, well-draining, potting soil amended with compost.
Spacing:
Container strawberries can be spaced 6-8 inches apart (3 plants per sqft). Keep in mind: the more space you give each plant, the bigger the berries the plant will produce.
Mulch & Water Often:
Ideally, you'd want to mulch your container strawberries to help retain moisture. The smaller your strawberry container, the more frequently you may have to water your plants (monitor the soil for dryness or use an automatic plant waterer).
Selecting the Best Site for Strawberries
The absolute ideal location for strawberries is a spot with full-sun, great drainage, and rich soil. This is what you are trying to achieve when preparing your strawberry bed. However, we don't always have access to the very best location for our plants; thus, you'll have to make adjustments to your growing strategy based on the short-comings of your location. For example, have a location with poor drainage? Then try growing your strawberries in raised beds, mounded hills, or containers. Poor sunlight? Choose an alpine variety which thrives in shade. With a little elbow grease and planning, you can grow prize-winning strawberries almost anywhere.
Strawberry Plant Care & Maintenance:
Once your strawberries are planted in the ground, it's easy to care for them on an ongoing basis. At the very minimum, strawberries need full sunlight and consistent watering to produce their fruit. We've added the task of fertilizing your plants to the list because it's a simple thing that you can do once or twice a year to maintain a healthy strawberry patch. If you really want to grow the biggest berries, read our section below on Advanced Strawberry Growing Tips.
Strawberry Watering:
Strawberries need about 1" inch of water per week. This is a general guideline and depends greatly on your plant's specific location, container, soil type, etc. What we like to do is test the soil for dryness every few days or so with an index finger. Strawberries have shallow roots which penetrate about 6" below the soil. If the top 2-3 inches of soil feels dry when you dig in with your finger, give your plants a water. If it feels moist or wet, wait a few days and test again.
Strawberry Fertilizing:
Care should be taken not to overfertilize strawberry plants. If your strawberries were planted in nutritious soil to begin with, they may not need to be fertilized. Skip the fertilizer if your plants are growing well, appear strong, and have dark green vegetative growth. Otherwise, you can side-dress your plants with compost, aged manure, or berry food shortly after the final harvest of the year in preparation for next season.
True Organic
Berry Food Fertilizer
Happy soil makes happy strawberry plants! Grow big, juicy, bright red strawberries with this organic strawberry fertilizer made with everything berries love.
Advanced Strawberry Growing Tips
Now that we've covered the basics of how to grow strawberries, it's time to discuss more advantage care and maintenance strategies. After all, who doesn't want massive harvests of big, juice, deep red strawberries? This section is for anyone who wants to go the extra mile and invest more time and energy into their strawberry patch for bigger harvests and berries. These are the techniques that we routinely use in our own strawberry patch and have consistently produced delicious results--enjoy!
Mulching Strawberries
Strawberries are called strawberries because a long time ago we all learned that these plants grow best when covered in a deep bed of straw. While you don't necessarily have to use straw, it is highly recommended that you mulch your strawberry patch. Mulching helps to retain moisture, keep weeds at bay, prevent fungal diseases, prevent fruit spoilage, and protects strawberries from frost during the winter months. All strawberry plants, whether planted in containers or in-ground beds, benefit from heavy mulching.
What's the Best Strawberry Mulch?
Strawberries can be mulched with straw, woodchips, pine needles, landscape fabric, and more. Some gardeners will use red mulch or red landscape fabric which has been shown to help strawberries grow bigger, faster, and sweeter!
How Much Mulch?
Strawberries benefit from heavy mulching in the fall/winter (4 or more inches) and lighter mulching during the spring and summer (to allow for adequate sunlight).
When & How to Mulch?
Mulch strawberries as soon as they have been transplanted outdoors. When temperatures drop consistently below 40°F, cover plants with 4-6" inches of mulch for winter protection. In the spring, remove the layer of mulch over each plant and expose them to sunlight once again.
Better Reds
Red Mulching Film For Strawberries
Did you know that surrounding your strawberries with red mulch increases yields by up to 20%? The best kept secret for mega strawberries is red mulch!
Pinching Strawberry Blossoms

Want to know the true secret to growing the biggest, juiciest, healthiest strawberries around? Remove the flower buds from your strawberry plants during the first season after planting. By removing the flower buds, the plant will focus all of its energy on deepening it's roots and growing much larger. The trade off? Strawberries emerge from strawberry blossoms, so pinching off the blossoms means that the plant won't produce any fruit that season.
For most gardeners, this delayed gratification is too much to cope with and they neglect to remove the blossoms in exchange for berries--asap. If you find that you simply cannot wait another to enjoy your strawberries, here are some tips:
Junebearer Blossoms:
Remove all of the blossoms from 50% of your plants. That way, you can enjoy berries now while "investing" in bigger berries in the future.
Everbearer Blossoms:
Everbearers have two fruiting cycles. Remove all of the blossoms from 100% of your plants during their first fruiting cycle (early summer) and enjoy bigger berries during the subsequent fall cycle.
Pruning & Propagating Strawberry Runners
To prune or to propagate, that is actually the question of the day when it comes to growing strawberries. The answer is quite simple: If you don't have space or simply don't want more strawberry plants, then cut the runners as they emerge from the base of the mother plant. If you have the space and want more strawberry plants, then propagate some runners and allow them to grow into adult strawberry plants by doing the following:
How to Propogate Strawberry Runners
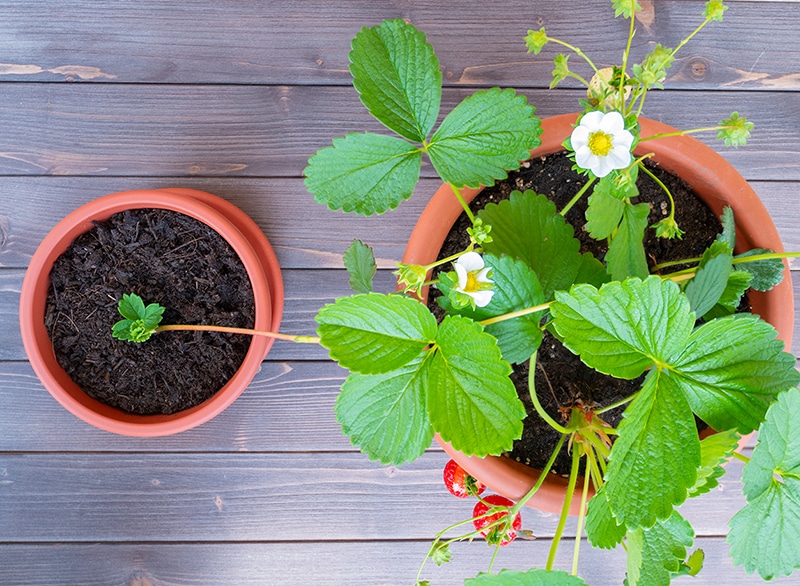
Identify a Runner and Root it in Place:
While the runner is still attached to the mother plant, place it in a desired location and lightly cover the stem of the runner with soil to encourage the plant to root in that spot.
Sever Once Rooted:
After a few weeks, the runner will have developed it's own roots. You can choose to sever the connection to the mother plant after rooting or keep the plants connected (this doesn't hinder the mother plant either way). If you are hoping to propagate strawberries in pots, then you'll need to root the runner into an adjacent pot and then sever the connection once the runner has established itself in the new pot.
Weeding the Strawberry Patch
Strawberries are poor competitors for weeds and their production can be easily diminished when grown in a bed alongside weeds. For this reason, strawberry beds need to be weeded pretty aggressively throughout the growing season. Luckily, if you've mulched your beds appropriately, then weekly weeding should be a piece of cake. In any case, remove weeds early and as often as possible from your strawberry patch.
Renovating the Strawberry Patch
Renovation is the process of cutting back strawberry plants before winter to reduce the incidence of disease and overcrowding amongst the patch. Renovation is typically only done with Junebearing strawberry patches using the Matted Row system because of their tendency to produce a lot of runners and daughter plants. Those using the Hill system with Ever-bearing varieties should not renovate their patches.
To renovate, simply take a weed whacker and remove the tops of all of the strawberry plants. The cut leaves can be turned under and used as compost or removed if disease is a cause for concern. Some gardeners claim that they can extend the life of their Junebearing strawberry patches by several years with yearly renovation.
Strawberry Companion Plants
Adding a few companion plants to your strawberry patch is another advanced growing technique with big rewards. Strawberries are delicate, vulnerable, and are easy for pests to find with their bright red fruits and delicious smell. Luckily, there are several plants that can help to deter pests, attract beneficial predators, and even enhance the nutrient profile of each berry.
A few of the best strawberry companion plants include borage, dill, alyssum, bush beans, lavender, alliums like onions and garlic, fennel, and yarrow. Do not plant strawberries with cabbage, potatoes, tomatoes, eggplants, peppers, and other nightshades as they compete for nutrients and share similar diseases.
Harvesting, Storing, & Preserving Strawberries

We could tell you to wait until your strawberries are deep red to pick them, but anyone with small children knows that waiting until berries are fully ripe is no easy task. While strawberries can be enjoyed with white tops and pink bodies, the true payoff comes from waiting until the berries are deep red and just slightly firm. Then, break each strawberry off at the stem (don't pull on the berries themselves or you'll crush them) and lay them in a harvest basket or tray. Try not to stack your berries more than two-layers high to avoid crushing the bottom berries.
There are endless ways to enjoy and preserve a bumper crop of strawberries. They can be enjoyed fresh, frozen, cooked, dehydrated, freeze dried, baked, fermented, you name it! Here are just a few of our favorite ways to enjoy strawberries:
Fresh Strawberries:
Strawberries are best enjoyed when picked and eaten fresh right away. If you cannot enjoy them right away, give them a quick vinegar rinse (1:3 ratio of vinegar to water), dry them thoroughly, and place them in a breathable container on a sheet of paper towel in the fridge. With this method, strawberries can be kept fresh for over a week.
Frozen Strawberries:
Freezing strawberries is incredibly simple and preserves your strawberry harvest for up to 12 months (although, we've personally stored frozen strawberries much longer than that). The best way to freeze strawberries is to place them on a baking tray on a single layer and freeze overnight. Once frozen individually, strawberries can be stored together in freezer bags without clumping up.
Dehydrated Strawberry Fruit Leather:
This is by far our favorite method of "preserving" strawberries. I say that in quotes because we eat the fruit leather so fast that it never ends up in storage. To make fruit leather, simply cook down your strawberries in a heavy-bottomed pot until soft, blend until smooth, cook on low until the puree has thickened, and then let cool to room temp. Pour a thin layer of the puree onto a baking sheet or dehydrator tray and dry on 145 degrees for 16 hours until no longer tacky.
Strawberry Growing & Maintenance Calendar
Don't let this lengthy article fool you---growing strawberries is actually quite simple and enjoyable! Here is a quick summary of the entire process of starting, planting, and harvesting strawberries--broken down into an timeline. This timeline is an approximation based on a typical four-season environment. Adjustments should be made for those in very cold and very warm growing zones.
January - February
New Strawberries: Research strawberry varieties, prepare your garden bed, purchase your strawberry seeds, bare root plants, and transplants.
Strawberry Seeds: Begin cold stratification by placing your seeds in the refrigerator for a minimum of 30 days before germinating. Sow seeds according to germinating instructions.
Existing Strawberry Bed: Continue to protect plants with heavy mulch during the winter months.
March - April
Transplant New Strawberries: Transplant your bareroot plants and plugs into the prepared garden as soon as the soil is workable. If necessary, protect new plants from lingering heavy frosts with row covers.
Transplant Strawberry Seedlings: Once strawberry seedlings are 2-3" tall, harden off and transplant into the garden.
Uncover Existing Strawberry Beds: Gently brush off mulch to expose strawberry plants to the spring sunlight. Do not remove the surrounding mulch.
May
New Strawberries: Monitor plants for runners and blossoms. Remove runners for Hill System. Train and propagate runners for Matted Row. Pinch off any blossoms that appear from now until the end of June.
Existing Strawberry Beds: Remove runners for Hill System. Train and propagate runners for Matted Row.
June - July - August
New Strawberries: Continue pinching blossoms. Apply fertilizer after summer blossoming has finished. Renovate Junebearing Matted Row strawberry beds after the summer harvest.
Existing Strawberries: Harvest summer fruit from all varieties of strawberries.
September - October
All Strawberries: Finish harvesting the late summer strawberries from Everbearers and Day Neutrals. Complete any strawberry bed renovations. Once temperatures consistently reach below 40°F, cover plants in 4-6 inches of mulch. Continue watering as normal and make adjustments as necessary for precipitation/snowfall.
November - December
All Strawberries: All strawberries should remain covered in heavy mulch throughout the winter months when hard frosts are possible.
Strawberry Diseases, Pests, & Troubleshooting
Strawberry plants are susceptible to a number of pests and diseases ranging from treatable to terminal. Most strawberry issues can be mitigated before planting via proper site selection and preparation, selecting disease-resistant cultivars, and buying plants from reputable nurseries; however, there are still a few issues that any gardener can run into despite their best efforts. In this section, we'll break down the most common strawberry diseases and their potential solutions.
Strawberry Diseases

Strawberries are susceptible to a few varieties of diseases caused by soil-borne fungi. Unfortunately, these diseases are terminal and all infected strawberry plants must be destroyed once identified. Prevention is the best strategy for combating strawberry fungal diseases. Protect your strawberries by keeping plants well-mulched to prevent fruit from contacting the soil, keep your strawberry patch clear of any dead leaves or fruit from, and water your strawberry plants from below to keep excess moisture off of the plant.
Strawberry Fruit Rot:
Strawberry fruit rot is a common disease also known as botrytis rot, fruit blight, and gray mold. Here's how to spot it in your garden:
- Some or entire parts of the plant are covered in a grey, velvety, fuzzy mold.
- Green and ripe berries begin to rot on the plant.
Solution: No known cure. Remove diseased parts of the plant (or the entire plant for severe infections) to stop the spread.
Strawberry Root Rot:
Strawberry root rot is a soil-borne strawberry disease also known as red stele. Caused by a fungi that is most prevalent in cooler climates and poorly-drained wet soils. Here's how to spot it in your garden:
- Reddish, brown leaves appearing in the second year.
- Plant wilt and plant death in the first season.
- Poor plant growth: small berries and few runners.
Solution: No cure. Fungus can remain in the infected soil for years. Destroy infected plants. Either choose a new planting location, select a red stele resistant variety, or both.
Verticillium Wilt:
Another soil-borne fungal disease which is best dealt with via prevention. Here's how to spot it in your garden:
- Leaves begin to wilt.
- Leaves change color from green to brown and fall off the plant.
Solution: No cure. Destroy infected plants and surrounding soil. Do not plant strawberries alongside or in beds following nightshades (tomatoes, eggplant, potatoes, peppers) or roses which are also susceptible to verticillium wilt. Plant disease resistant varieties including Surecrop, Catskill, and Allstar.
Strawberry Pests
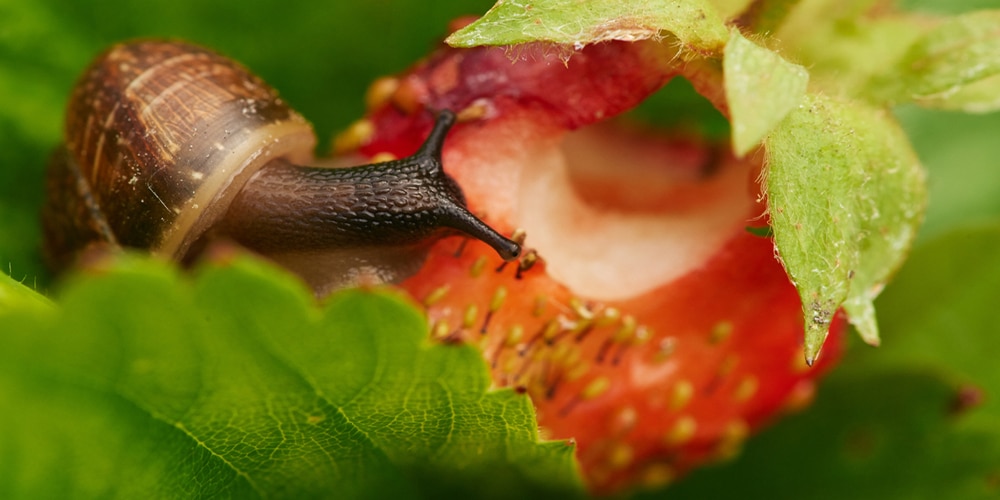
From birds to beetles, there is no shortage of potential pests for your strawberry patch. Unlike fungal diseases, strawberry pests are much easier to deal with when they occur. The key is to stay vigilant and monitor your plants regularly for signs of infestations. Here is a table containing information on how to identify certain strawberry pests and remove them:
| Pest | Problem | Solution |
|---|---|---|
| Strawberry Bud Weevil | Small insects which damage blossom buds and leaves. | Remove infested flower buds. Manually remove adults. Beneficial nematodes may prevent larval root damage. Dust infected areas with sulfur. |
| Strawberry Seed Weevil | Small beetle that eats seeds from outside of strawberry. | Pest is attracted by weeds. Weed patch often. Remove weevils at night by hand. |
| Strawberry Crown Borer | Beetle which lays eggs in strawberry crowns causing plant death. | No treatment. Plants due without apparent cause. Move strawberry patch to a new location. |
| Grubs | Larvae of June bugs eat strawberry roots. | Examine roots of dead plant for evidence of grubs. Beneficial nematodes help control grub infestations. |
| Strawberry Leaf Roller | Small insects that feed on the underside of leaves. | Examine plants frequently for upward curled leaves. Remove and burn all infected leaves. |
| Slugs | Pests that eat the flesh of fruit at night. | Avoid wet soils. Apply diatomaceous earth 3" around plant base. Try a beer trap. |
| Birds | Animals eat and damage ripening strawberry fruit. | Use floating row covers or fruit cages. Try painted decoy rocks while plants are blossoming. |
How to Buy Strawberry Plants & Seeds
There are two great days as a strawberry gardener: the day you harvest your first strawberry and the day you buy your strawberry plants! Shopping for new plants for your garden can be a lot of fun--if not a little overwhelming. There are so many varieties, online stores, growing options, and choices to make when planning your strawberry patch. To make life easier, we've put together this quick guide to buying strawberry plants and seeds. We hope it helps!
Step One: Identify Your Grow Zone
Enter your zip code into the official USDA plant hardiness zone calculator to find out your growing zone. You'll need this to find strawberry plants that grow best in your climate.
Step Two: Choose Your Strawberry Type
Decide if you're going to grow Junebearers (1x harvest/year), Everbearers (2x harvests/year), Alpine (multiple small harvests/year), or a combination. For example, you could grow a large patch of Junebearers in the garden, some Everbearers in a container on a windowsill, and Alpine strawberries as edible garden edging.
Step Three: Where Will You Grow Your Berries?
Decide where and how you will grow your strawberries. Will you grow them in a container, raised bed, or in-ground patch? Will you be growing using the matted row system (better suited to large beds and Junebearers) or Hill system (best for Everbearers small spaces and containers or those who do not want to propagate runners)?
Step Four: Buy Your Strawberries
Now that you know your grow zone and have a garden plan, it's time to buy your strawberry plants. Strawberry plants can be purchased at local nurseries and online retailers. We've purchased strawberry plants online for years and prefer it because it allows us to order our plants in the winter when local nurseries are closed. Below, we've compiled a list of each strawberry type, grow zone, and our favorite online nurseries that sell them:
- Allstar Strawberry: Bareroot | mid/late season | zones 3-8 | popular and easy to grow | resistant to soil-borne fungi | great for canning.
- Honeoye Strawberry: Bareroot | early/mid season | zones 3-8 | high yield | great for cold climates | susceptible to root rot.
- Earliglow Strawberry: Potted plug | early season | zones 4-8| high yield.
- Eclair Strawberry: Bareroot | early season | zones 4-8 | resistant to soil-borne diseases
- Chandler Strawberry: Bareroot | mid season | best for warmer climates | medium to large fruit.
- Chandler Strawberry: Potted plug | mid season | best for warmer climates | medium to large fruit.
- Sparkle Strawberry: Bareroot | late season | zones 4-8 | resistant to red stele and leaf spot.
Frequently Asked Questions About Growing Strawberries
How Long Does It Take For Strawberries To Produce Fruit?
Junebearing strawberries rarely produce a large crop of fruit during their first year. Everbearing and Day Neutral strawberries can produce strawberries during their first year (usually in late summer). Strawberries produce fruit 30 days after blossoming.
