Want more spider plants? Well, you've come to the right place! Your existing spider plants can be easily propagated into many additional spider plants. These popular houseplants have earned a reputation of being "hard to kill" which, in turn, makes them brainlessly easy to propagate (you seriously can't mess this up). You don't need to have a green thumb, special equipment, or special knowledge to divide these plants either. In fact, with just a few minutes of work, you can fill your home with dozens of new spider plants from just one starting mother plant. Ready to get propagating? In this guide, we'll breakdown the basics of propagating spider plants and everything else you'll need to know to get started.
Snapshot: Spider Plant Propagation
Difficulty Level:
Easy. Beginner Friendly.
Easiest Propagation Method:
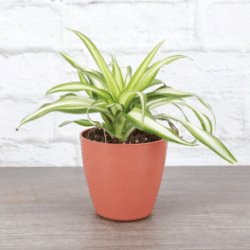
Planting spider plant babies. Remove spider plant baby and plant in a new small (6" or smaller) pot with potting soil.
Most Difficult Propagation Method:
Dividing spider plant root ball. Using hands or a sharp gardening knife, split the root ball of a mature spider plant into two separate root clumps.
Best Soil:
Well-draining, neutral pH (6-7), fertile potting soil.
Pot Size & Repotting:
Plants prefer small pots (approx 4-6" inches diameter for young plants). Repot when roots grow out of the top or bottom of pot into a pot 2" inches larger in diameter.
Getting Started: Basics of Spider Plant Propagation
Spider plants are one of the simplest houseplants to propagate. In fact, these plants literally grow new baby plants for you that can be easily potted. While propagating spider plant babies is the most popular method, there are actually three different ways to propagate spider plants: rooting the spiderettes, splitting the mother root ball, and growing spider plants from seed. Let’s explore each method in more detail:
Propagating Spider Plant Babies:
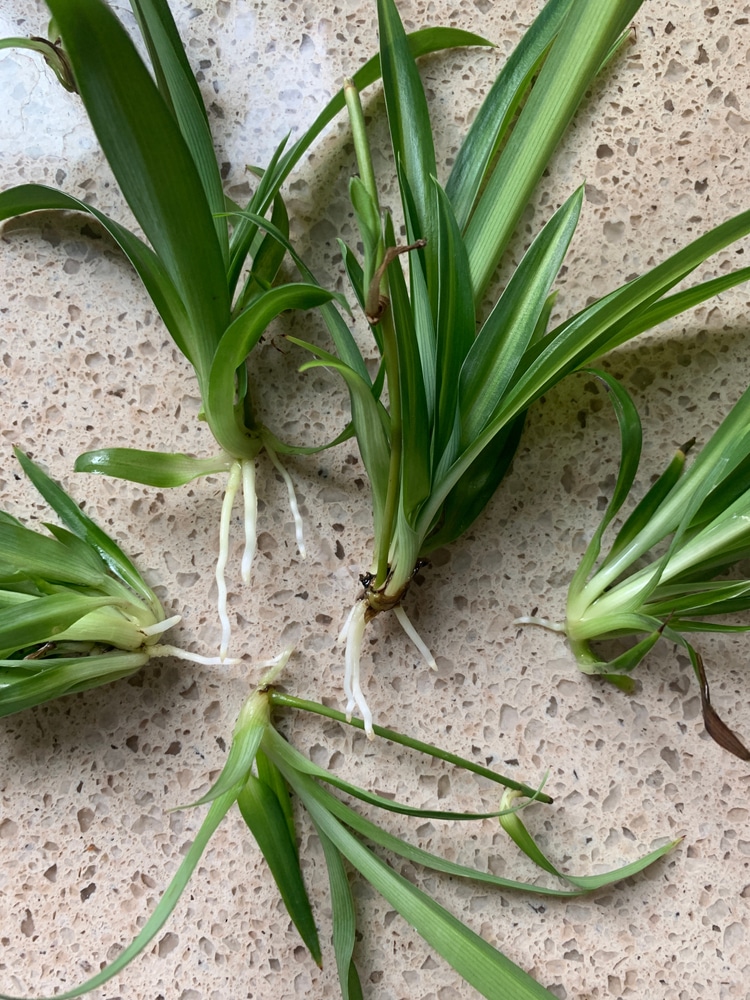
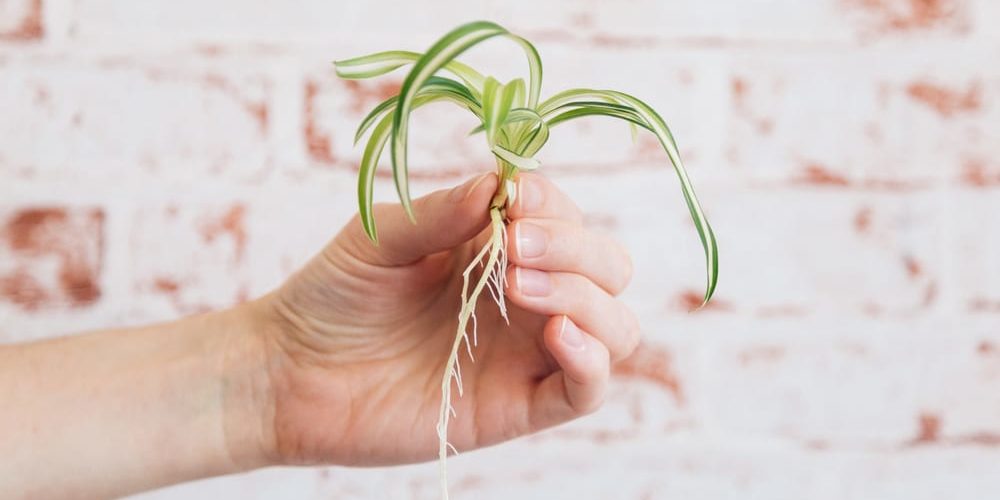
Spider plants produce small dangling "baby" spider plants that go by many names such as spider plant babies, pups, spiderettes, and plantlets. These baby spider plants can be rooted and propagated in their own pot.
Propagating Spider Plants From Root Balls:
The root ball of the spider plant can be divided in two to create two separate spider plants.
Growing New Spider Plants From Seed:
When the flowers of the spider plant are fertilized, they will produce a fruit which contains spider plant seeds. These seeds can be collected and sowed just as you would any other garden seed.
- 6" Small Ecopot w/ Saucer: A small indoor plant pot with great drainage and made from 80% recycled plastics. Perfect size for propagating small spider plant pups.
- Root Strengthening Transplant Fertilizer: A water-soluble seaweed fertilizer that helps to strengthen plant roots to prevent transplant shock.
- Organic Potting Soil: A high-quality natural and organic potting soil with good drainage that is formulated for indoor plants.
6″ Small Recycled Ecopots
w/ Saucer for Drainage
The perfect little pot for new spider plant propagates. Has great drainage, is just the right size to allow for 1-2 years of new growth, and is made from all recycled materials.
Propagating Spider Plants From Babies
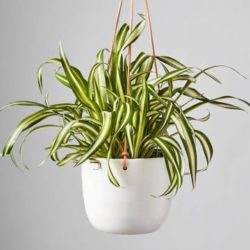
Did you know that your spider plant could have babies? As the seasons change, the days become longer, and the spider plant becomes pot bound due to its spring growth, your spider plant may begin to grow long stalks. These stalks (also known as spiderettes, plantlets, offsets, spider plant babies, and pups) dangle down from the mother plant and will eventually produce baby spider plant leaves and flowers. These babies can be left to hang from the plant for a dazzling hanging display, cut off for a more manicured look, or removed and propagated into entirely new plants.
Propagating spider plant babies is easy to do because these babies were born to live on their own--literally. Your spider plant babies will soon sprout tiny root buds which enable the plantlet to live on its own (with or without the mother plant). All you have to do is provide a nice new home for your spider plant baby and the rest basically takes care of itself.
How to Root Spider Plant Babies
Spider plant babies can be easily rooted and planted into a new pot when they are young. There are three different methods for rooting spiderettes: in water, attached to the mother, unattached to the mother.
Propagating Babies Attached to Mother:
Spider plant babies are attached to the mother plant by a stalk which hangs down from the stolon. These babies can be lightly potted into a new pot while still attached to the mother plant. After the roots of the baby plant have been properly established, the stalk attaching the baby to the mother can be severed. The advantage of this method is that it allows the mother plant to continue nourishing the plantlet until it has developed its own root system and is strong enough to survive solo.
- Step 1: Place baby plantlet on top of a small planter pot filled with potting mix or a seed starter blend. Cover the bottom of the plantlet (where the roots would be) lightly with your choice of soil or starter. Keep the soil moist.
- Step 2: When the spider plant baby develops roots, you can sever the connection between the mother plant and the baby.
Propagating Babies Unattached to Mother:
In the case of hanging or hard to reach spider plants, it may be easier to propagate plantlets by severing the connecting between the baby and the mother plant before potting them up.
- Step 1: Simply cut the connecting stalk before placing the plantlet on top of a small pot of soil.
- Step 2: After a week or so, you'll begin to see small buds (roots) emerge from the bottom of the plantlet. Keep these roots moistened and lightly covered with soil.
Propagating Babies in Water:
Some people prefer to help their spider plant babies establish roots before potting them. The idea is that pre-rooting the babies will help them thrive when planted in soil. One of the quickest ways to encourage spider plant babies to develop roots is to set the baby in a cup of water.
- Step 1: Fill a short glass with filtered or distilled water.
- Step 2: Remove the spider plant baby from the mother plant by cutting away the connecting stolon where it attaches to the baby plant.
- Step 3: Set the spider plant baby in the glass of water ensuring that only the root-end touches the water and not the leaves. Replace water when it begins to look dirty to keep it fresh and clear.
- Step 4: When roots begin to emerge from the spider plant baby, it is time to remove the plant from the water and give it a new home in a pot with soil.
- 6" Small Ecopot w/ Saucer: A small indoor plant pot with great drainage and made from 80% recycled plastics. Perfect size for propagating small spider plant pups.
- Root Strengthening Transplant Fertilizer: A water-soluble seaweed fertilizer that helps to strengthen plant roots to prevent transplant shock.
- Organic Potting Soil: A high-quality natural and organic potting soil with good drainage that is formulated for indoor plants.
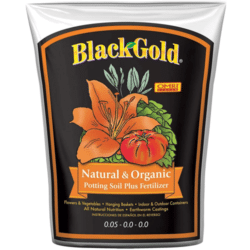
Sun Gro Potting Soil
Natural & Organic Potting Soil
Hands down our favorite potting soil for vegetables and houseplants alike. Packed with nutrients and has provides excellent water drainage.
Propagating Spider Plants by Dividing Root Balls
Mature spider plants which have grown too large can be divided into two or more plants by splitting the root ball. You don't have to worry too much about dividing the root ball of a spider plant because their roots will grow back vigorously. In fact, you may have to divide the root balls of your spider plants as a part of routine maintenance every few years to keep your spider plant healthy. Here's a quick step by step tutorial on how to propagate spider plants from the roots:
Step 1: Prepare the Root Ball
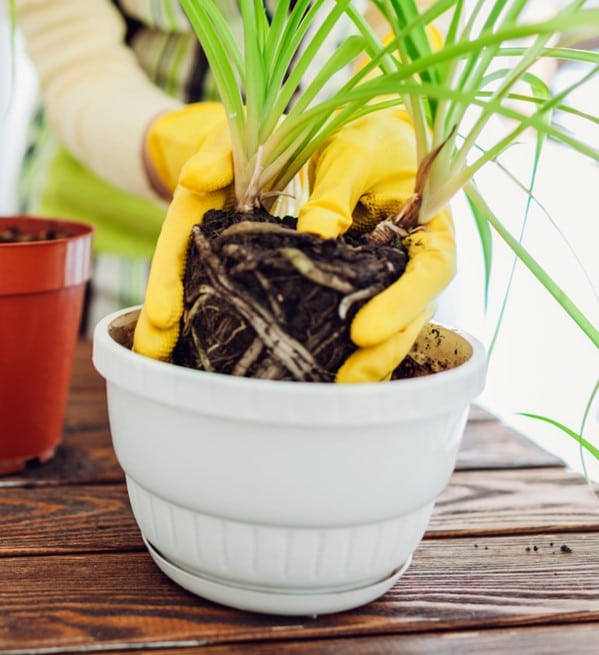
Remove the spider plant from its pot and clear away the dirt from the outside of the root ball. You can do this with your hand or by gently rinsing off the outside of the root ball under a sink.
Step 2: Identify & Cut
Examine your spider plant root ball and try to identify clumps of roots that lead to groupings of shoots. (See image. Notice how the spider plant leaves come out of the roots as two distinct plants?) Using your hand (or a sharp gardening knife) gently separate the root clumps to create separate plants with their own root systems.
Step 3: Plant & Nourish
Plant your new spider plants in their own pots with well-draining potting soil. Water thoroughly and add a diluted seaweed fertilizer to help strengthen the roots and prevent transplant shock. Keep plant in a low-light room for a few days while the roots get adjusted before moving to a location with bright, indirect sunlight.
Growing Spider Plants From Seed
Did you know that it is possible to collect seeds from your spider plants? One of the most underrated ways to propagate spider plants is by planting new spider plants from seeds gathered from existing plants. Starting spider plants from seed is a long-term labor of love, but the end result is an endless supply of spider plant seeds to be planted whenever and wherever you choose. Here's what is takes to propagate spider plants from seed:
Step 1: Pollinate Your Flowers
In order for your spider plant to produce fruit, its flowers must be pollinated. You can pollinate your plants by hand or the natural way. To pollinate by hand, simply take a soft cotton swab or paintbrush and gently brush the inside of each flower (this transfers pollen form one flower to another). To pollinate the natural way, place your flowering spider plant outside in a shaded location for a few days so pollinators can do their job.
Step 2: Allow Seed Pods to Dry
If fertilization was successful, then tiny little green seed pods will develop after the flowers die back. Allow these seed pods to dry on the plant until they begin to crack open. Carefully remove the dry pods from the plant and pour out the tiny black spider plant seeds into a tray. You can now plant these seeds right away or store in a seed envelope in a dark, cool location.
Step 3: Plant Your Seeds
Plant your spider plant seeds at a ratio of 1 seed per square foot. Sow your seeds as you would any other garden vegetable seed and be sure to keep the soil moist and provide plenty of light while the seed germinates. It can take over 30 days for spider plant seeds to germinate, so be patient. Because of the long sprout time, it may be more convenient to start a handful of spider plant seeds in seed starting trays under grow lights.
Helping Your New Spider Plants
When propagating and transplanting plants into new locations there is always the chance of the plant dying from transplant shock. Transplant shock occurs when the plant experiences significant stress to the root system and fails to root successfully in the new environment. Using a water-soluble kelp fertilizer at the time of transplanting or propagation provides the plant with a healthy dose of nutrients so that the plant is less likely to be stressed. We feed our plants this every time we repot, transplant, or propagate to ensure that our plants adapt quickly and grow vigorously.
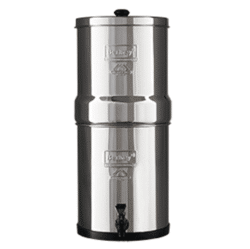
Also, don't forget to water your new spider plants with filtered or distilled water. Spider plants are sensitive to chemical build up and tap water contains chemicals such as chlorine and fluoride which accumulate in the plant and cause brown tips. Berkey water filters are great options for filtering tap water. For more tips on how to raise healthy happy spider plants, check out our complete Spider Plant Care Guide.
Seaweed Extract
Root Strengthening Fertilizer
A water-soluble fertilizer that protects and stimulates growth in the roots. The ideal fertilizer for transplanting, propagation, and repotting.
Where to Buy Spider Plants Online
Not interested in any of the above-described spider plant propagation methods? You can still expand your spider plant empire by shopping for spider plants at reputable online plant retailers. Here are a few of our favorites:
Buy high-quality live spider plants online.
Shop Bloomscape's colorful potted spider plants.
Shop for live spider plants on Etsy.
Buy live potted spider plants in pots online.
Spider Plant Propagation Troubleshooting
Are your new spider plants having trouble? By far the most common ailment to strike spider plants are brown tips and browning foliage caused by direct sunlight, low humidity, and the build-up of chemicals in the plant. Other issues include a spider plant not flowering (you need flowers for seeds!), not producing spiderettes (crucial for propagation), and overwatering. Here’s how to troubleshoot:
No Spiderettes:
Problem: Spider plant is not producing spiderettes or babies.
Cause: Overly large pot.
Solution: Pot bound spider plants produce more spiderettes. Move to a smaller pot or allow more time between repotting.No Flowers:
Problem: Spider plant is not producing flowers.
Cause: Too much light at night or too much fertilizer.
Solution: Place plant in completely dark location at night.Brown Leaves:
Problem: Brown plant tips & edges.
Cause: Watering with water contaminated with fluoride and chlorine.
Solution: Water spider plants with filtered water or distilled water only.Root Rot:
Problem: Yellowing leaves, wilted foliage, soil appears wet and muddy.
Cause: Overwatering, bad drainage, overly large pot.
Solution: Repot into new, dry potting soil. Use a pot with drainage holes.Overwatering:
Problem: Entire leaf turns brown. Dying foliage. Wet soil.
Cause: Overwatering.
Solution: Reduce watering frequency. Wait until 1-2 inches of soil is completely dry to the touch before watering.Underwatering:
Problem: Leaves appear pale and flaccid.
Cause: Underwatering.
Solution: Increase watering frequency. Do net let soil get too dry in between waterings.
Big Berkey Water Filter
2.25 Gallon Home Tabletop Filter
Provide pure water for your plants, pets, and family members with the classic Berkey Tabletop Water Filter System. Removes over 203 contaminants from drinking water that could hurt your plants (such as fluoride and pesticides).
Frequently Asked Questions About Spider Plant Propagation
Why is My Spider Plant Not Flowering?
Spider plants flower as a result of spring's longer daylight hours. As the plant grows rapidly, the roots become a bit pot bound and this triggers the plant to produce spiderettes or spider plant babies. Too little light and a pot that is too large may be the reason why your spider plant is not producing flowers.

