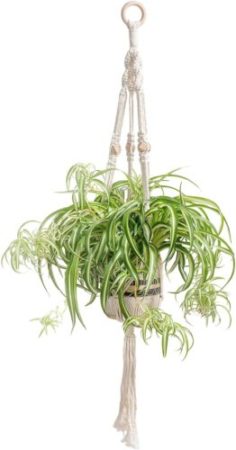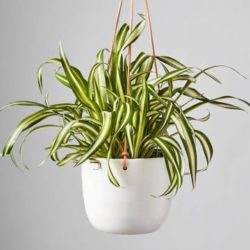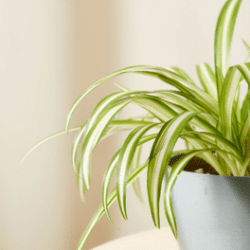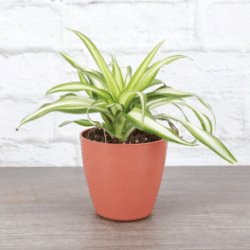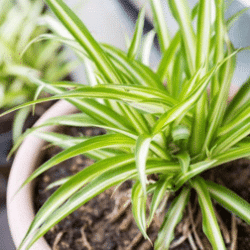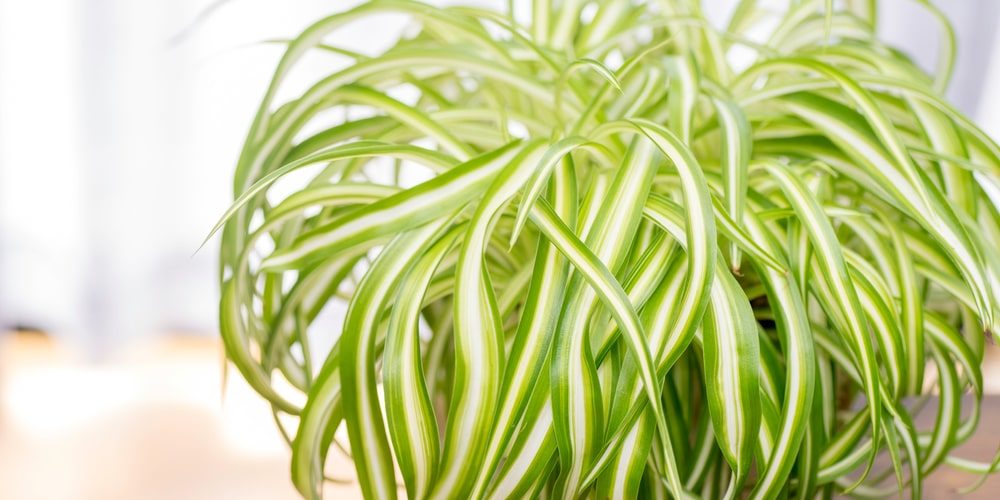
Spider plants (chlorophytum comosum) are beautiful tropical perennial house plants which produce long thin leaves (up to 1.5ft long!) resembling spider legs and small baby plants that dangle down from the mother. Although it may not look like it, these plants are actually members of the asparagus family. Spider plants are loved by both plant lovers and self-proclaimed "black thumb" plant killers because it's one of the hardest houseplants to kill. It can tolerate low light conditions, cramped spaces, small pots, and chronic underwatering. Spider plants are also known to live for upwards of 50 years! To top it all off, this low maintenance plant has been noted by NASA for its ability to purify the air. All in all, the benefits of owning a spider plant far outweigh the cost of maintenance. Ready to add a spider plant to your space? Whether you are new to houseplants or a veteran plant collector, this guide to taking care of spider plants will walk you through everything you need to succeed.
Snapshot: Taking Care of Spider Plants
Maintenance Level:
Low maintenance house plant.
Sunlight:
Tolerates both bright, indirect sunlight (high growth) and low light conditions (low growth). Avoid direct sunlight.
Watering:
Use distilled or filtered water without fluoride. Water when the top 1-2" inches of soil are dry. Weekly in the summer, less in the winter.
Best Soil:
Well-draining, neutral pH (6-7), fertile potting soil.
Temperature:
Ideal temperature is between 65-75°F.
Humidity:
Ideal humidity is between 25-49%.
Fertilizer:
Optional. Water soluble houseplant fertilizer once per month during the spring & summer months.
Pot Size & Repotting:
Plants prefer small pots (approx 4-6" inches diameter for young plants). Repot when roots grow out of the top or bottom of pot into a pot 2" inches larger in diameter.
Pet & Human Toxicity:
Non-toxic for pets, children, and adults. May cause upset stomach and vomiting if digested.
Getting Started: Basic Spider Plant Care
Taking care of a spider plant is super easy. Spider plants are highly tolerant of neglect from their plant owners; thus, they require little maintenance other than water and sunlight. However, if you really want your spider plants to produce beautiful flowers, spiderettes, and healthy foliage, then you’ll need to do more than just the bare minimum. Luckily, a little pruning, fertilizing, cleaning, and repotting is all that is needed to grow a big, healthy, vibrant spider plant.
Daily Spider Plant Care:
- Spider plants require almost no daily maintenance. Monitor daily for any abnormalities and make sure that the plant is getting bright, indirect sunlight throughout most of the day.
Weekly Spider Plant Care:
- Water your spider plant thoroughly once the top 1-2 inches of soil begins to dry out (usually once a week in the spring and summer).
Monthly Spider Plant Care:
- During the spring & summer months add a general houseplant fertilizer each month.
- Clean the plant by wiping down each leaf with a soft cloth dampened with warm soapy water.
- Check plant thoroughly for signs of pests and disease.
- Optional. Rotate plant to ensure each side gets adequate sunlight.
Seasonal Spider Plant Care:
- Fertilize once per month during the spring and summer months.
- Prune plant in summer & spring (do not prune in winter) as needed.
- Ensure that your spider plant’s location still receives adequate sunlight as the seasons change.
Yearly Spider Plant Care:
- Repot young plants yearly or once the roots outgrow the pot.
- Repot older plants every two years.
- Water Soluble Houseplant Fertilizer: A fertilizer balanced for houseplants that can be added to the plant's watering can and easily applied each month.
- Long Spout Watering Can: Indoor plants can sometimes be hard to reach. This watering can makes it easier to water plants in high locations.
- All Natural Castile Soap: A gentle all-natural soap which can be diluted and used to clean your spider plant.
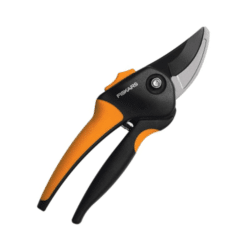
- Houseplant Pruning Shears: It's important to get a clean cut when pruning your spider plants. Try these super sharp shears that are the perfect size for pruning spider plant leaves.
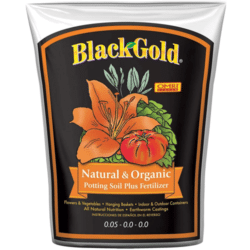
- Organic Potting Soil: A high-quality natural and organic potting soil with good drainage that is formulated for indoor plants.
Where to Put Your Spider Plant Indoors?
Spider plants thrive in warm, draft-free, humid locations out of direct sunlight. Bathrooms with windows are notoriously great locations for spider plants because they offer indirect sunlight and high humidity. Choose a location for your spider plant that is away from furnaces (too dry), air condition units (too cold), entrance doors (too drafty), or sky lights (too much direct sunlight). It’s important to re-evaluate your spider plant’s location every season to make sure that it is still an ideal spot. For example, a window which provided great light and warmth for your plant during the summer may be too cold during the winter months.
Hanging Spider Plants
One of the most popular ways to display a potted spider plant is to hang it. The plant’s long leaves and dangling flowers offer a dramatic look as they flow down from a hanging pot. Hanging plants require a careful consideration when mounting to avoid choosing improper hardware, falling plants, and plants that are too hard to reach. When hanging a spider plant, here are some things to consider:
Hanging Height
Make sure that you hang your spider plant low enough that you can easily reach it for ongoing maintenance with the use of a stool or step ladder. You want to be able to water your plant, monitor the soil, and routinely clean the leaves.
Hanging Hardware:
Never hang your spider plant using improper hardware! Choose a hook that can easily support the weight of your spider plant and pot. Install the hook into a stud in the ceiling or use an appropriate drywall anchor. Using poorly installed or weak hardware when hanging plants could result in significant damage to your ceiling.
Watering
How will you water your hanging spider plants? Watering hanging plants can be tricky. I like using an old-fashioned watering can with a long spout that makes it easy to water from below.
- Super Strength Swiveling Ceiling Hook: Extra strength ceiling hook mount that swivels. Perfect for hanging small to large spider plants.
- Macrame Hanging Plant Holder: A sturdy woven rope plant hanger that you can use to hang your spider plant pot.
- Hanging Houseplant Watering Can: Hanging plants can be hard to reach. This watering can has a long spout that makes it easier to water plants in high locations.
New! Dehydrated Ginger Bug Starter
Live Cultures! Made With 100% Organic Ingredients
Make your own homebrewed probiotic sodas with our Ginger Bug Soda Making Kits!
Watering a Spider Plant
Are you the kind of person who can never remember to water your houseplants? Or are you someone who travels a lot? If so, then a spider plant may be the right houseplant for you. Spider plants store water reserves in their root system which they can tap into if water becomes scarce. Because of this feature, it is better to err on the side of underwatering your spider plants rather than overwatering. When underwatered, spider plants access their root-stored water reserves. When overwatered, the plant can quickly succumb to root rot and browning foliage.
Water Weekly or When Soil is Dry:
Spider plants prefer moist, lightly watered soil. In the summer, when temperatures are high and soil dries out quickly, be sure to water your spider plants at least once per week. During the winter, when the plant is growing less and demands less water, allow the soil to dry-out to the touch between each watering. This means waiting until the top 1-2 inches of soil in the pot are dry.
Use Filtered or Distilled Water:
Spider plants are sensitive to chemicals in tap water. Watering with tap water or water contaminated with chemicals such as chlorine and fluoride can create excess salt build-up in the soil and turn the leaves of your spider plant brown. Water your spider plants with distilled or filtered water to avoid this problem.
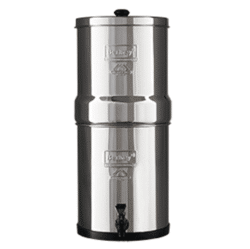
Big Berkey Water Filter
2.25 Gallon Home Tabletop Filter
Provide pure water for your plants, pets, and family members with the classic Berkey Tabletop Water Filter System. Removes over 203 contaminants from drinking water that could hurt your plants (such as fluoride and pesticides).
Spider Plant Sunlight Requirements
Spider plants love moderate, bright, yet indirect sunlight. The leaves of the plant will quickly scorch and die when exposed to intense direct sunlight. Find a location in your home that is naturally bright and place the spider plant just outside of any direct sun beams. If you can’t find a bright location, it’s okay to place your spider plant in a low-light room. Bright light simply helps the spider plant to produce vibrantly colored leaves whereas plants grown in low-light will have less vibrancy.
Temperature & Humidity
Think of spider plants as tropical plants that love warm, humid conditions. The ideal temperature for a spider plant’s environment is between 65°-75° F with humidity levels ranging between 25-50%. Temperatures that are too high (over 80° F) and humidity that is too low (under 10%) can cause stress, disease, and turn the tips of the plant brown; thus, it is important to keep your plant somewhere in its ideal range.
Humidifiers and diffusers are wonderful tools to maintain ideal humidity levels around your spider plant. Simply place your spider plant near a humidifier or buy a small portable humidifier just for your spider plants. Another simple way to add humidity to your spider plant's environment is to mist your plants with a spray bottle occasionally throughout the week.
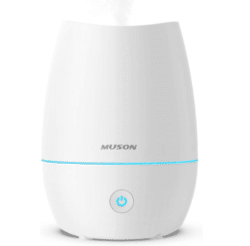
Muson Ultrasonic Humidifier
Humidifier & Diffuser
Provide a tropical humid environment for your moisture-loving houseplants with this small portable humidifier and diffuser.
Spider Plant Fertilizer
Spider plants can benefit from fertilizers when used during the growing season and when repotting. However, care should be taken not to overfertilize spider plants because they are prone to mineral build-up. Many plant owners run for the fertilizer the minute their plants start to look sad. If your spider plant is turning brown, has wilted leaves, and appears dull-looking, the problem might not be a lack of fertilizer (check out the section on Spider Plant Troubleshooting below).
Fertilize sparingly with a balanced houseplant fertilizer, water soluble fertilizer, or worm compost tea once per month during the spring and summer months. Do not fertilize spider plants during the winter months when the plant has entered a period of slower growth and cannot use the excess minerals.
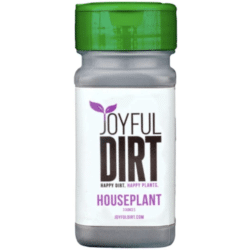
Joyful Houseplant Fertilizer Shaker
Organic Premium Houseplant Fertilizer
An easy to use and water-soluble organic houseplant fertilizer that will help boost your spider plant's growth.
Best Soil for Spider Plants
Many plant owners don’t realize how important good soil is for the health of their houseplants. In fact, there is no better “fertilizer” for your plants than rich soil. When potting your spider plant, choose a high-quality, well-draining, neutral pH potting soil. If you live a particularly dry environment, amend your potting soil with coconut coir for added water retention. On the other hand, if you live in a very humid climate and need more drainage, add perlite to your potting mix. You could also combine a blend of both coconut coir and perlite to create your own balanced mix.
Sun Gro Potting Soil
Natural & Organic Potting Soil
Hands down our favorite potting soil for vegetables and houseplants alike. Packed with nutrients and has provides excellent water drainage.
Spider Plant Pot Size
The best pot for a spider plant is one that is big enough to allow for some plant growth, yet small enough for the roots to become pot-bound within a year or so. Spider plants thrive when they are slightly pot-bound. Pots that are too large can contribute towards root rot, slow plant growth, and poor flowering for spider plants. For young plants, choose a pot that is between 4" and 6" inches in diameter. Additionally, you’ll want to choose a pot that has good drainage and airflow. A hanging pot is also a great choice. Clay or terracotta pots are great choices for spider plants because they are porous and allow for good airflow. Resist the urge to plant your spider plants in a large pot to avoid having to repot them in a year. While it may save you a bit of time in the future, you are risking the health of your plant.
Pruning a Spider Plant
Spider plants can get wild and tangled if left unpruned. Technically, you don’t “need” to prune your spider plants; however, your plants will look healthier with an occasional pruning. How often and how much you prune your spider plant depends on the variety of plant and its general state of care. Plants that have been well taken care of may only need a light pruning each season whereas neglected plants may need more thorough pruning.
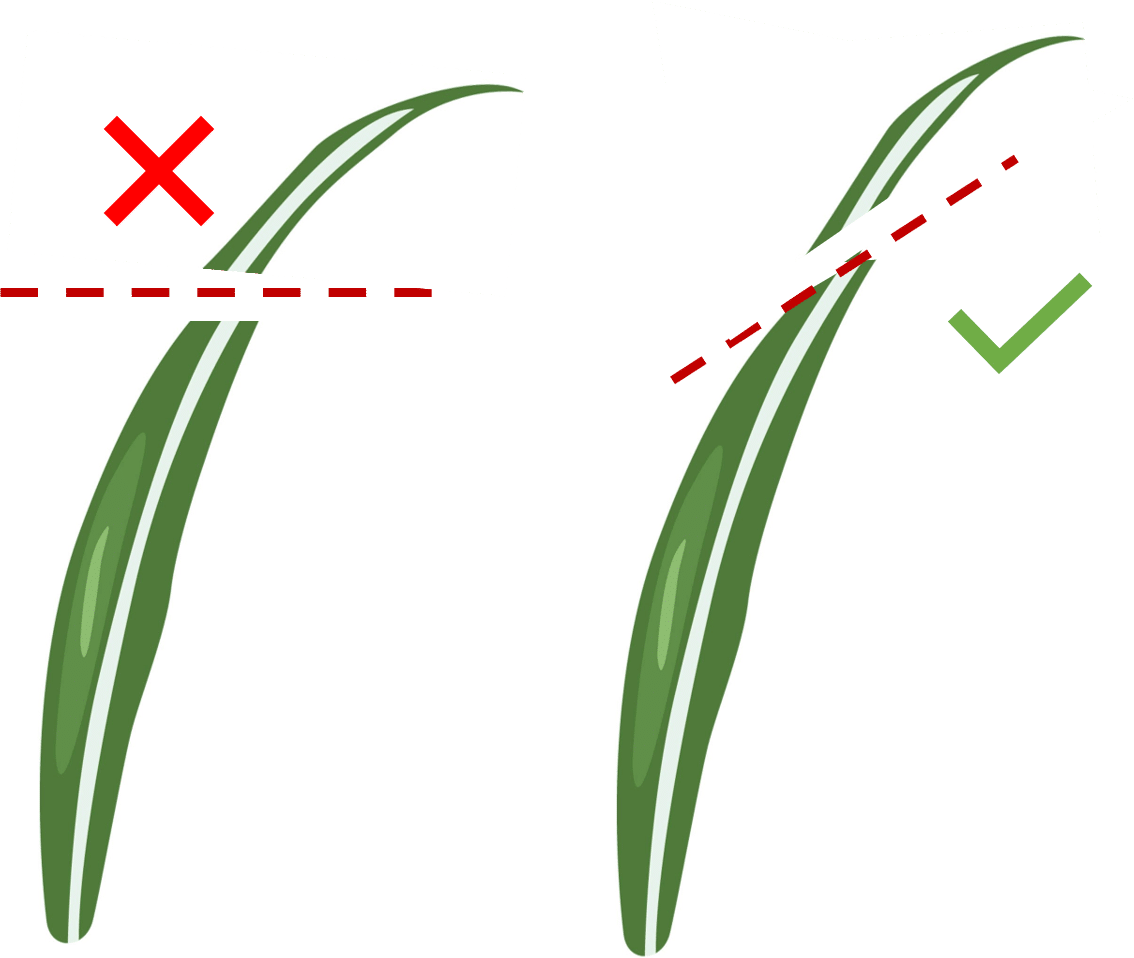
Spider plants should be carefully pruned each season as needed. Pruning includes removing all dead, diseased, and discolored foliage, trimming brown tips and leaves, removing excess spiderettes, and cutting back long leaves. When cutting your spider plant leaves, cut the leaves at an angle to recreate the shape of the leaf (blunt straight across cuts will make your plant look choppy).
Fiskar Soft Grip Pruning Shears
Small House Plant Pruning Shears
The perfect sized pruning shears for cutting angled cuts in the long skinny leaves of a spider plant.
Where to Buy Spider Plants Online
Buy high-quality live spider plants online.
Shop Bloomscape's colorful potted spider plants.
Shop for live spider plants on Etsy.
Buy live potted spider plants in pots online.
Spider Plant Propagation, Transplanting, & Repotting
Spider plants are known to grow vigorously. As your spider plant gets larger, it’ll eventually outgrow its current pot—literally. Spider plants are known to break pots with their powerful root systems! Additionally, healthy spider plants will sprout smaller spider plants, often called spiderettes, which can be repotted and propagated into an entirely new spider plant. Staying on top of your plant’s root growth with routine repotting is key to the successful long-term health and wellness of the plant.
- Seaweed Fertilizer: A water-soluble fertilizer that boosts plant growth and protects against transplant shock by strengthening plant roots.
- Sun Gro Black Gold Potting Mix: A balanced and well-draining potting mix plus fertilizer that has worked wonders for all of our potted plants.
How to Transplant & Repot Spider Plants?
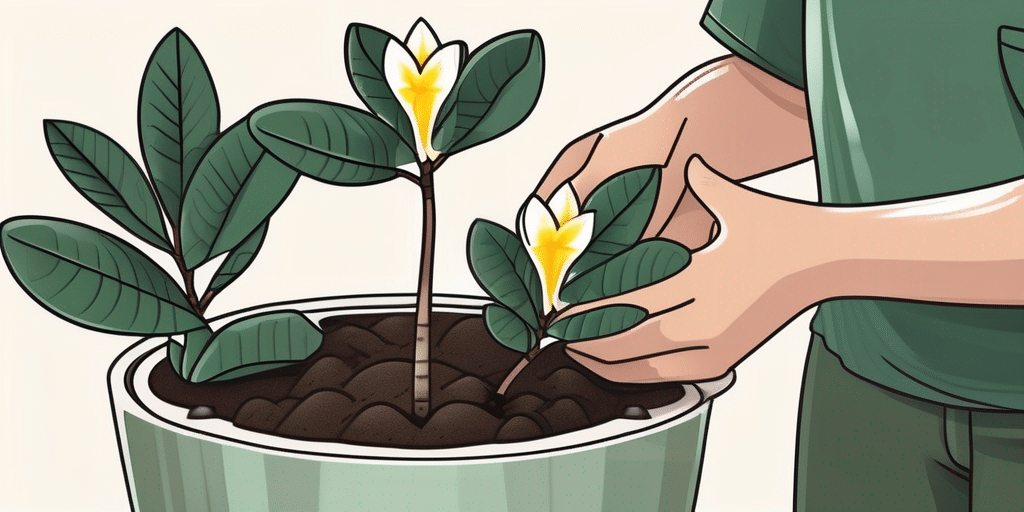
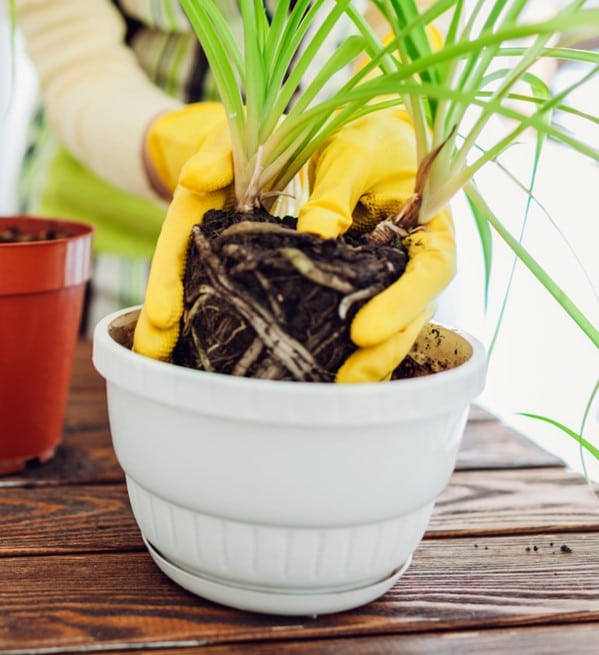
It will be very obvious when your spider plant is in need of repotting. Spider plant roots are known to bust out of the bottom or grow over the top of most pots after about a year or so. Once the plants become pot bound, it is time to upgrade them to a new pot that is just slightly larger than their existing pot. While it may be tempting to repot your spider plant into a much larger pot to reduce the frequency of having to repot, it is best to resist that temptation. Spider plants like to be a bit pot bound (in fact, this triggers the development of spider plant babies) and thrive in pots that provide just enough space for them to grow. Using a pot that is too large can result in root rot (too much water retention in the soil). Here’s how to repot your spider plants into a new pot:
Best Time to Repot Spider Plants:
- When plant looks sad, has stopped growing, or has roots that are growing outside of the container.
- Wait until spring, if possible, to encourage plant growth.
Best Pot Size:
- Select a pot with good drainage holes that is 2-3 inches larger in diameter than the plant’s current pot.
Spider Plant Transplanting Instructions:
- Place a small amount of potting soil in the bottom of the new pot.
- Gently remove plant from old pot by placing your hand at the base of the plant with your palm on the soil for support.
- Slowly flip the pot upside down while gently wiggling the plant from side to side from the base until the root ball slides out of the pot.
- Place plant into new pot.
- Ensure that there is at least 1” inch of space between the soil line and the top of the pot. If not, add more soil to the bottom of the pot until there is.
- Fill in soil around the plant making sure to cover the roots without burying the crown.
- Water thoroughly with a water-soluble root strengthener to prevent transplant shock.
Spiderettes, Plantlets, Babies, & Pups
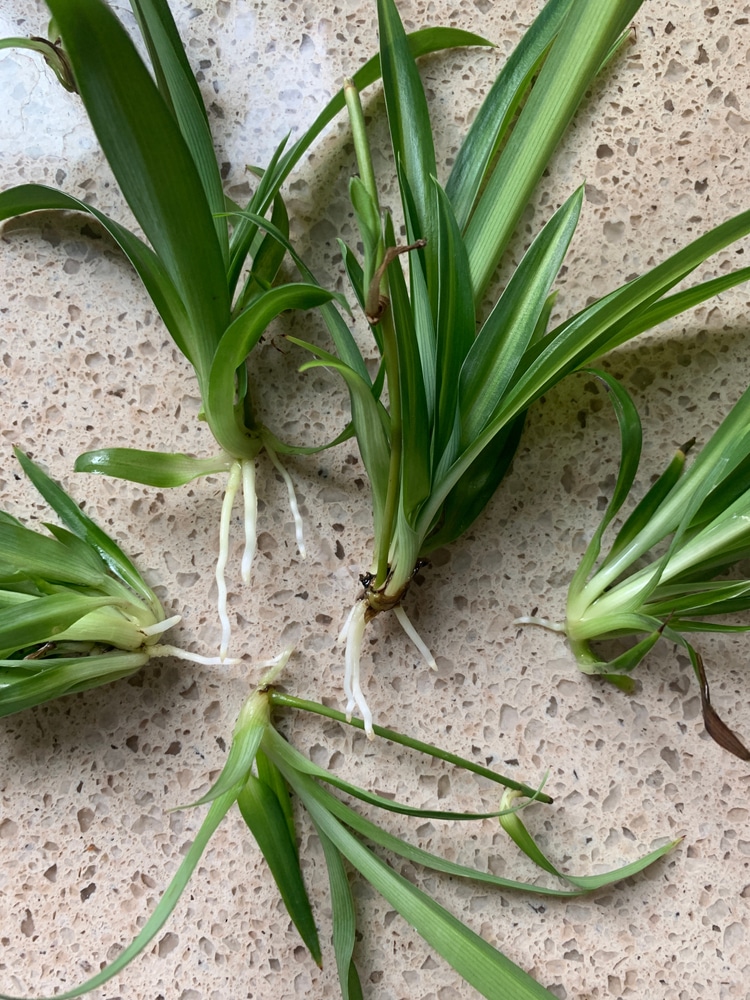
As the seasons change, the days become longer, and the spider plant becomes pot bound due to its spring growth, your spider plant may begin to grow long stalks. These stalks (also known as spiderettes, plantlets, offsets, spider plant babies, and pups) dangle down from the mother plant and will eventually produce baby spider plant leaves and flowers. These babies can be left to hang from the plant for a dazzling hanging display, cut off for a more manicured look, or removed and propagated into entirely new plants.
Spider Plant Propagation
Spider plants can be easily propagated into many additional spider plants. With just a few tricks, you can fill your home with spider plants from just one starting mother plant. There are three ways to propagate spider plants: rooting the spiderettes, splitting the mother root ball, and growing spider plants from seed. Let’s explore each method in more detail.
How to Propogate Spider Plants:
Rooting Spiderettes:
Spiderettes can be easily rooted and planted into a new pot when they are young. There are three different methods for rooting spiderettes: in water, attached to the mother, unattached to the mother. If your spider pups have developed roots, then simply cut it away from the mother plant and plant the pup in moist soil. If your spiderettes have not developed roots, then place the baby plant in a pot of soil near the mother plant while leaving it attached to the mother. Keep the soil moist until the baby plant develops roots of its own. Then, cut away the spiderettes from the mother.
Dividing the Mother Root Ball:
Mature spider plants that have grown too large can be divided into two or more plants by dividing the root ball. To divide a spider plant, remove the plant from its pot and use your fingers to loosen the soil around the roots. Identify the large tuberous roots and separate them into clusters. Each cluster of root tubers can be replanted as a new plant.
Growing Spider Plants from Seed:
If a spider plant’s flowers are pollinated, then the flowers will develop into fruit which produce seeds. To pollinate, let your spider plant spend some time outside each day or hand pollinate each flower using a soft brush or cotton swab. Once the flowers produce fruit, let the fruit dry so that the seeds are easier to access. These seeds can be harvested and planted as you would any other vegetable garden seed.
Unique Ways to Grow Spider Plants
Spider plants are extremely versatile and hardy plants that can survive in a variety of climates and conditions. Because of this fact, plant lovers have explored a few less common ways of growing spider plants including growing spider plants outdoors and growing spider plants in water.
Growing Spider Plants Outdoors:
Spider plants enjoy humid warm weather and can be successfully grown outdoors in zones 9-11. Even when grown outdoors, plants should be grown in light shade and out of direct sunlight to avoid scorched foliage.
Growing Spider Plants in Water:
Instead of propagating spiderettes in soil, it is possible to propagate spider plant babies in water. Spiderettes will develop roots and be ready to transplant in less than 7 days when rooted using water.
Spider Plant Diseases, Pests, Pets, & Troubleshooting
Even the best kept spider plants may experience some disease or pest problem in their lifetimes. Luckily, spider plants are resilient plants and suffer from very few ailments when compared to more delicate houseplants. With spider plants, all it takes to keep your plant healthy is a little routine maintenance and some preventative measures. In fact, you can keep your spider plant so healthy that it might live longer than you! Let’s review the most common threats to your spider plant’s health and dive into whether or not spider plants are a threat to you or your pets health.
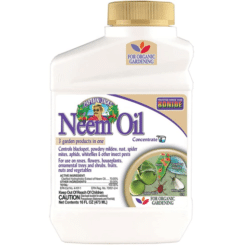
- Neem Oil for Gardening & Plants: Can be diluted with water and used to wipe away pests such as aphids, whiteflies, and mealybugs. Has a really strong scent.
- Rubbing Alcohol: Another solution for wiping down spider plants. Smell fades over time.
- Castile Soap: Can be used to wipe away pests. Unscented.
Spider Plant Brown Tips & Leaves
By far the most common ailment to strike spider plants are brown tips and browning foliage. There are three things that may cause browning: direct sunlight, low humidity, and the build-up of salts and other minerals in the plant. While the build up of salts in the plant isn’t fatal, direct sunlight and chronic low humidity can kill your plants; thus, it is important to correctly identify the source of your spider plant’s browning leaves to avoid killing the plant. Here’s how to troubleshoot:
Brown Leaves Caused by Chemical Build Up:
Spider plants are susceptible to mineral build up in the soil and root system. This build up causes the plant to develop brown tips as the salts accumulate in the plant's foliage. Fluoride and chlorine, particularly from tap water and some fertilizers, are known to contribute towards this salt build up. Here's how to know if your spider plant's brown leaves are caused by chemical build up:
- Plant’s leaves have brown tips & edges, but otherwise looks healthy.
- Plant is watered with tap water containing fluoride or chlorine.
- A white salt crust may develop on the surface of the plant.
- Plant has been heavily fertilized with chemical fertilizers.
Solution: Stop using tap water to water your plants. Instead, water thoroughly with rain, distilled, or filtered water to flush the salts from the soil. Continue watering with clean filtered water each week. Wipe away any salts that may form on the plant leaves. Prune away existing brown tips and monitor for resurgence.
Brown Leaves Caused by Low Humidity:
Spider plants need a nice humid environment in order for their foliage to remain bright, plump, and strong. In low humidity & dry environments, a spider plant's foliage begins to wither and brown. Here's how to know if your spider plant's brown leaves are caused by low humidity:
- Plant’s leaves are faded and browning all over (not just on the tips)
- Plant seems a bit limp
- Plant is placed near a furnace, AC unit, or drafty location.
- Room humidity measures below 20%
Solution: Place a diffuser or humidifier near your plant to increase the humidity levels in the plant's immediate environment. You can also move your plant to a higher humidity location such as a bathroom. Alternatively, mist your plants routinely with a spray bottle filled with water. How often you will need to mist or use the humidifier will depend on your specific humidity levels (use them more if humidity is in the single digits or less if humidity is close to the healthy spider plant range of 25-50%).
Brown Leaves Caused by Direct Sunlight:
While spider plant's do love tropical environments that are warm and humid, the plant cannot tolerate direct sunlight and high temperatures above 80°F. When the leaves of the spider plant come in contact with direct sunlight or high temperatures for too long, the leaves will begin to brown and wither. Here's how to know if your spider plant's brown leaves are caused by too much heat and sun:
- Plant receives more than a few hours of direct sunlight each day.
- Plant has experienced high temperatures for a few days (above 80°F).
- Plant’s leaves are browning all over (not just the tips)
Solution: Change plant’s location to one that receives little to no direct sunlight. If that’s not possible, then try to provide shade for the plant via window coverings etc. Alternatively, you can rotate your spider plants daily to reduce the amount of time any one side receives direct sunlight. Prune away sun damaged parts of leaves to improve the plant’s aesthetic.
Spider Plant Pests
Even though your spider plant lives indoors, it can still find itself infested with outdoor pests. Aphids, whiteflies, spider mites, scale, and mealybugs are all common pests that can find their way to your spider plant. Luckily, indoor plant pest infestations are easily manageable with good hygiene and a few everyday items from around the house.
| Pest | Problem | Solution |
|---|---|---|
| Aphids | Small insects suck nutrients from plants. | Wipe away bugs with a paper towel moistened with rubbing alcohol or neem oil. Clean plant periodically for prevention. |
| White Flies | Small insects suck nutrients from plants. | Wipe away bugs with a paper towel moistened with rubbing alcohol or neem oil. Clean plant periodically for prevention. |
| Mealybugs | Small insects suck nutrients from plants and leave a white residue. | Wipe away bugs with a paper towel moistened with rubbing alcohol or neem oil. Clean plant periodically for prevention. |
| Scale | Small insects that appear as brown bumps on plants. Cause yellowing of leaves by removing nutrients from foliage. | Wipe away bugs with a paper towel moistened with rubbing alcohol or neem oil. Clean plant periodically for prevention. |
Keep Your Spider Plants Clean
Do you routinely clean your spider plant? Did you know that routine cleaning of your spider plant’s leaves is the best way to prevent pests and disease? One benefit of indoor plants over outdoor plants is that you can simply wipe off any pest infestations and dirt. Take a cloth and moisten it with rubbing alcohol or warm soapy water (or diluted neem oil if you are having a pest problem). Then, simply wipe down the front and back of each of your spider plant’s leaves. Clean up any fallen dead leaves or debris that may be around the base of the plant or in the pot. Do this at least once per season (or more if your plant accumulates dust or pests easily) for each plant.
Neem Oil for Plants
Organic Gardening Neem Oil
Rid your houseplants and outdoor gardens of common pests like aphids and mealybugs with this pesticide made from 70% all natural neem oil. Suitable for organic gardening.
Spider Plant Troubleshooting
Is there something wrong with your spider plant and you can't figure out what's causing the problem? Troubleshooting spider plant problems can seem tricky at first, but it's actually quite easy to deduce the cause of your plant's issue. Problems such as overwatering, underwatering, and lack of spider plant babies can be easily identified and corrected if you know what to look for. Here are a few of the most common spider plant issues and how to tackle them:
Root Rot:
Problem: Yellowing leaves, wilted foliage, soil appears wet and muddy.
Cause: Overwatering, bad drainage, overly large pot.
Solution: Repot into new, dry potting soil. Use a pot with drainage holes.Overwatering:
Problem: Entire leaf turns brown. Dying foliage. Wet soil.
Cause: Overwatering.
Solution: Reduce watering frequency. Wait until 1-2 inches of soil is completely dry to the touch before watering.Underwatering:
Problem: Leaves appear pale and flaccid.
Cause: Underwatering.
Solution: Increase watering frequency. Do net let soil get too dry in between waterings.No Flowers:
Problem: Spider plant is not producing flowers.
Cause: Too much light at night or too much fertilizer.
Solution: Place plant in completely dark location at night.No Spiderettes:
Problem: Spider plant is not producing spiderettes or babies.
Cause: Overly large pot.
Solution: Pot bound spider plants produce more spiderettes. Move to a smaller pot or allow more time between repotting.
Spider Plant Toxicity: Children, Cat, & Dogs
One of the best features of the spider plant is that it's non-toxic to both humans and animals. Now, just because something is non-toxic doesn't mean that it should be eaten. In fact, spider plants can cause nausea, diarrhea, and upset stomach in cats, dogs, and humans if the foliage is ingested. Don't worry, your pet or child hasn't been poisoned! Spider plant leaves can cause gastrointestinal irritation and should not be eaten. For this reason, it is best to keep spider plants out of reach of pets that seem interested in your spider plant. Hang plants to protect them from cats or place on a high shelf to deter dogs and other pets.

Frequently Asked Questions About Spider Plants
Why is My Spider Plant Not Flowering?
Spider plants flower as a result of spring's longer daylight hours. As the plant grows rapidly, the roots become a bit pot bound and this triggers the plant to produce spiderettes or spider plant babies. Too little light and a pot that is too large may be the reason why your spider plant is not producing flowers.
